Building a simple MCP Server in Java
In this guide, we are going to build a simple Model Context Protocol (MCP) server using Java. We will then connect the server to an AI assistant host (Claude for Desktop in this case).
Note: This tutorial assumes that you’re familiar with basic AI/LLM concepts.
All source code for this guide is available on GitHub.
What is MCP?
The Model Context Protocol (MCP) is a standardized way for AI applications and agents to connect with data sources and tools. It allows AI models like Claude to interact with your local system, external services, and custom tools through a standardized interface.
Typically, LLMs are not able to fetch (and serve) real-time data. Most LLMs are trained on data that has a particular cutoff date. For example, if you ask Claude to give you information about the current weather in Nairobi, here’s what you get (prompting done on 4th May 2025):
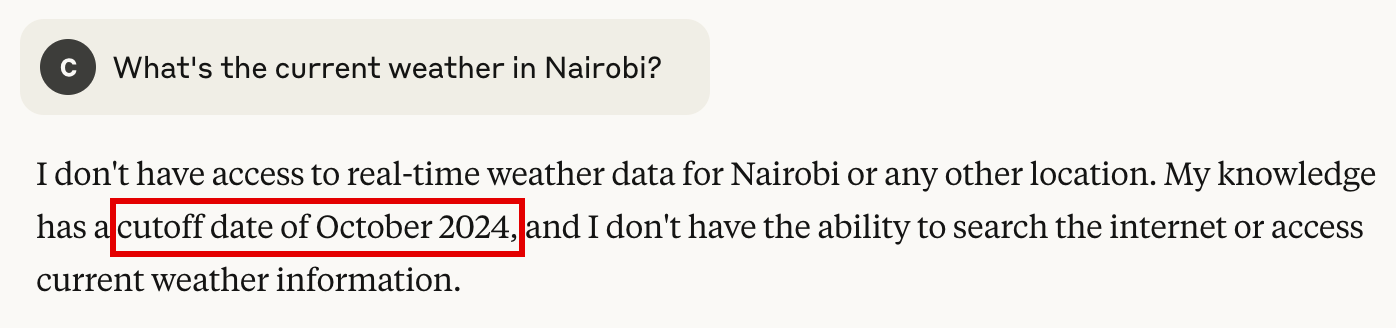
This is where MCP comes in. Using the protocol, applications can provide context to LLMs. In our particular case, we want to provide Claude with the ability to fetch real-time weather data from a remote service.
General MCP architecture
At its core, MCP follows a client-server architecture where a host application can connect to multiple servers:

As you can see from the architecture diagram above, MCP allows a host/client application to connect to different sources of data (either locally or via remote services) through multiple MCP servers.
Main MCP concepts
MCP servers typically provide three main types of capabilities:
- Tools: Functions that can be called by an LLM (with user approval)
- Resources: File-like data that can be read by clients (like file contents or API responses)
- Prompts: Pre-written templates that help users accomplish specific tasks
In this tutorial, we are mainly going to focus on tools.
What we will build
We are going to build a simple weather MCP server that exposes a single tool: getWeatherDetailsByLocation. Then we’ll connect the server to an MCP host (in this case, Claude for Desktop). We’ll use the wttr.in API to fetch real-time weather data for different locations.
Project requirements
The following are the main requirements for the project:
- Java 17 or later
- Maven 3.6 or later
- Spring Boot 3.3.x or later
- Claude for Desktop for AI assistant integration (used as an MCP Client)
Setting up the project
You can use Spring Initializer to bootstrap the project.
Project dependencies
This project relies on the following key components:
<dependencies>

	<dependency>
	<groupId>org.springframework.ai</groupId>
	<artifactId>spring-ai-starter-mcp-server</artifactId>
	</dependency>

	<dependency>
	<groupId>org.springframework</groupId>
	<artifactId>spring-web</artifactId>
	</dependency>

</dependencies>
Project structure
Here is the general structure of the project:
src/
├── main/
│   ├── java/
│   │   └── dev/chiedo/weathermcpserver/
│   |       ├── model/
│   |       |   └── WeatherDataResponse.java
│   |       ├── service/
│   |       |   └── WeatherService.java
│   │       └── WeatherMcpServerApplication.java
│   └── resources/
│       └── application.properties
└── test/
    └── java/
        └── dev/chiedo/weathermcpserver/
            ├── service/
            |   └── WeatherServiceTest.java
            └── WeatherMcpServerApplicationTests.java
Implementing the MCP server
The main component of the MCP server is the weather service, which is implemented as shown below:
File: src/main/java/dev/chiedo/weathermcpserver/service/WeatherService.java
@Service
public class WeatherService {

    private final RestClient restClient;

    public WeatherService(RestClient.Builder restClientBuilder) {
        this.restClient = restClientBuilder
                .baseUrl("https://wttr.in/")
                .defaultHeader("Accept", "application/geo+json")
                .defaultHeader("User-Agent", "WeatherApiClient/1.0")
                .build();
    }

    @JsonIgnoreProperties(ignoreUnknown = true)
    public record WeatherDescription(
            @JsonProperty("value") String value
    ) {}

    @JsonIgnoreProperties(ignoreUnknown = true)
    public record CurrentWeatherCondition(
            @JsonProperty("temp_C") String tempCelsius,
            @JsonProperty("temp_F") String tempFahrenheit,
            @JsonProperty("humidity") String humidity,
            @JsonProperty("windspeedKmph") String windSpeed,
            @JsonProperty("weatherDesc") List<WeatherDescription> weatherDescription
    ) {}

    @JsonIgnoreProperties(ignoreUnknown = true)
    public record WeatherApiResponse(
            @JsonProperty("current_condition")
            List<CurrentWeatherCondition> currentWeatherCondition
    ) {}

    @Tool(description = "Get weather details for a specific location")
    public WeatherDataResponse getWeatherDetailsByLocation(String location) {
        String encodedLocation = UriUtils.encode(location, StandardCharsets.UTF_8);
        String url = encodedLocation + "?format=j1";

        WeatherApiResponse apiResponse = restClient.get()
                .uri(url)
                .retrieve()
                .body(WeatherApiResponse.class);

        CurrentWeatherCondition currentWeatherCondition = apiResponse.currentWeatherCondition().get(0);
        String weatherDescription = currentWeatherCondition.weatherDescription().get(0).value();

        return new WeatherDataResponse(
                location,
                weatherDescription,
                currentWeatherCondition.tempCelsius(),
                currentWeatherCondition.tempFahrenheit(),
                currentWeatherCondition.humidity(),
                currentWeatherCondition.windSpeed()
        );
    }
}
The service uses a REST client to query weather data from the wttr.in weather API. @Tool is a Spring AI annotation that makes it easy to create and maintain MCP tools. In this particular case, the annotation indicates that the getWeatherDetailsByLocation method is available as a tool that can be called by an LLM.
The main application code looks like this:
File: src/main/java/dev/chiedo/weathermcpserver/WeatherMcpServerApplication.java
@SpringBootApplication
public class WeatherMcpServerApplication {

    public static void main(String[] args) {
       SpringApplication.run(WeatherMcpServerApplication.class, args);
    }

    @Bean
    public ToolCallbackProvider weatherTool(WeatherService weatherService) {
       return MethodToolCallbackProvider.builder().toolObjects(weatherService).build();
    }
}
Here, we use the MethodToolCallbackProvider builder to convert the methods annotated with @Tool into actionable callbacks used by the MCP server.
Server configuration properties
All properties related to the MCP server are prefixed with spring.ai.mcp.server:
File: src/main/resources/application.properties
spring.application.name=Weather MCP Server

# Required STDIO transport configuration
spring.main.web-application-type=none
spring.main.banner-mode=off
logging.pattern.console=

# MCP Server configuration
spring.ai.mcp.server.enabled=true
spring.ai.mcp.server.name=mcp-weather-server
spring.ai.mcp.server.version=0.0.1
Note: You must disable the banner and console logging to allow the STDIO transport to work.
Building the project
To build the project, run the following:
./mvnw clean install
This will generate a weather-mcp-server-0.0.1-SNAPSHOT.jar file in the target directory.
Running the MCP server
To start the MCP server, execute the jar file like so:
java -jar target/weather-mcp-server-0.0.1-SNAPSHOT.jar
Integrating the server with Claude for Desktop
Follow the steps below to integrate the server with Clause for Desktop:
- Open Claude Desktop
- Go to
Settings - Select the
Developersection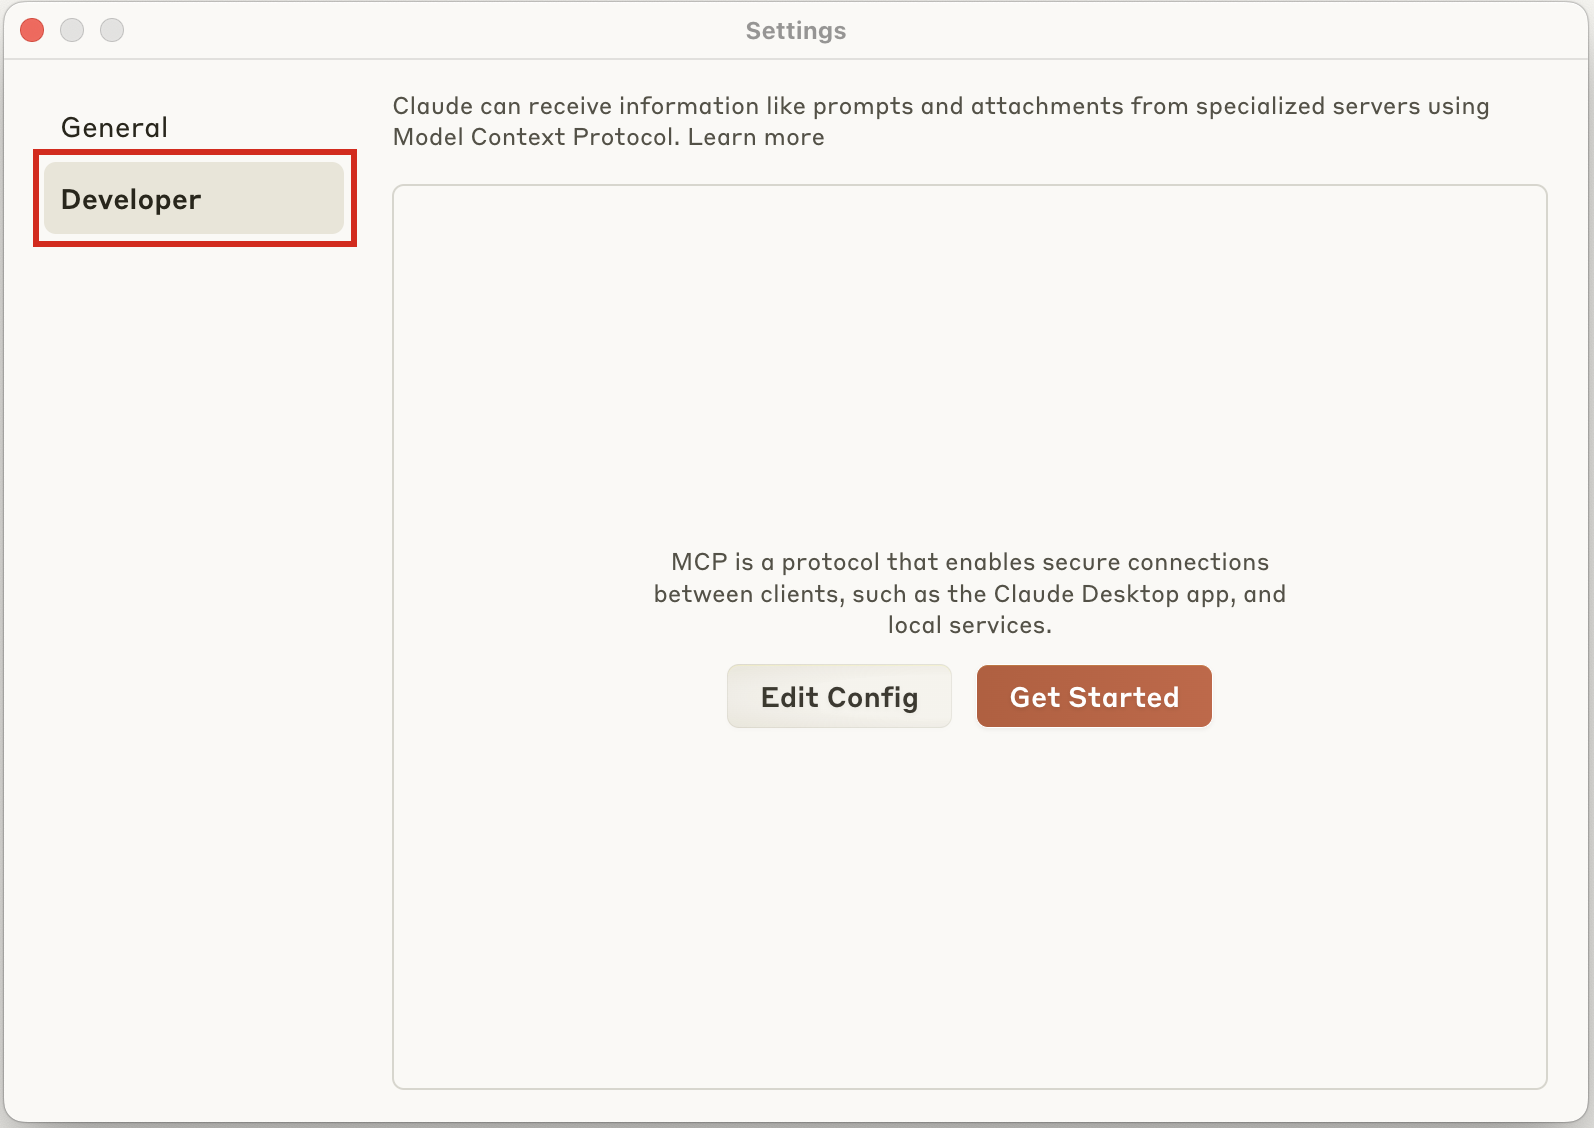
- Click the
Edit Configbutton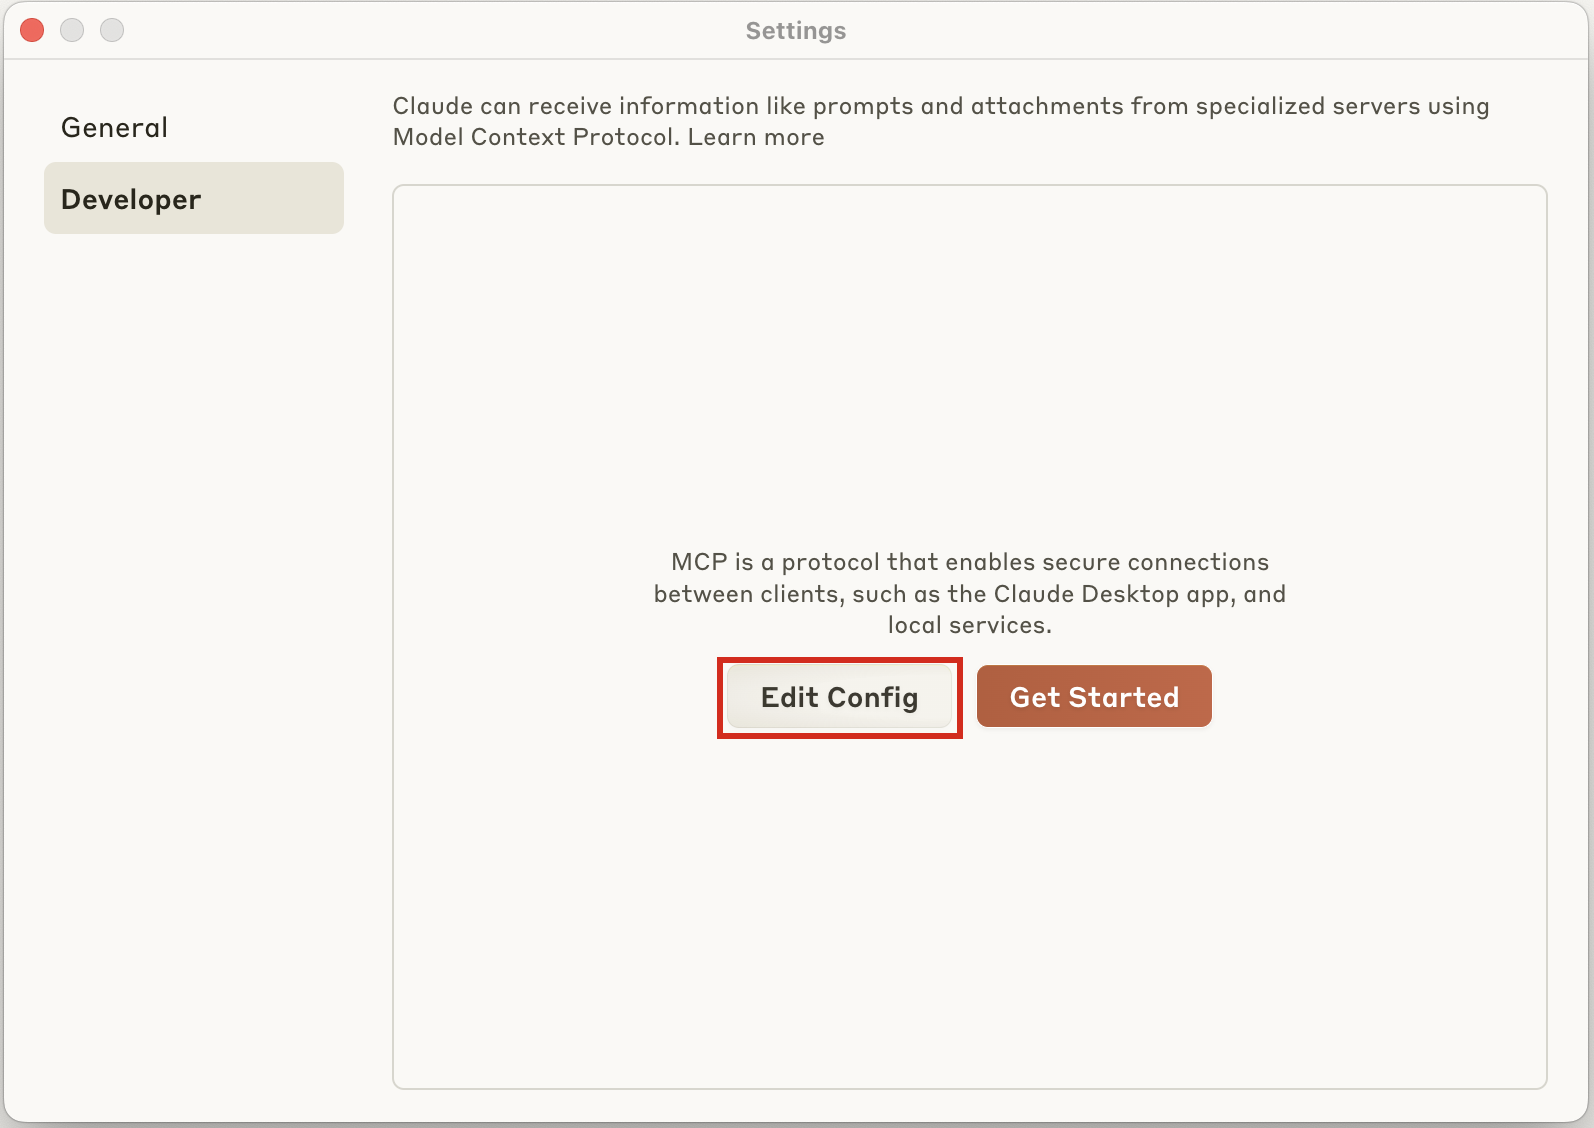
- Open the
claude_desktop_config.jsonfile in an editor of your choice. Note: On MacOS, the config settings file can be opened directly using:vi ~/Library/Application\ Support/Claude/claude_desktop_config.json - Add the following configuration to the
claude_desktop_config.jsonfile:{ "mcpServers": { "mcp-weather-server": { "command": "java", "args": [ "-Dspring.ai.mcp.server.stdio=true", "-jar", "/absolute/path/to/weather-mcp-server-0.0.1-SNAPSHOT.jar" ] } } }Note: Remember to replace
/absolute/path/to/with the actual path to your built jar file. The settingspring.ai.mcp.server.stdio=trueenables STDIO transport mode. - Save the file and restart Claude Desktop
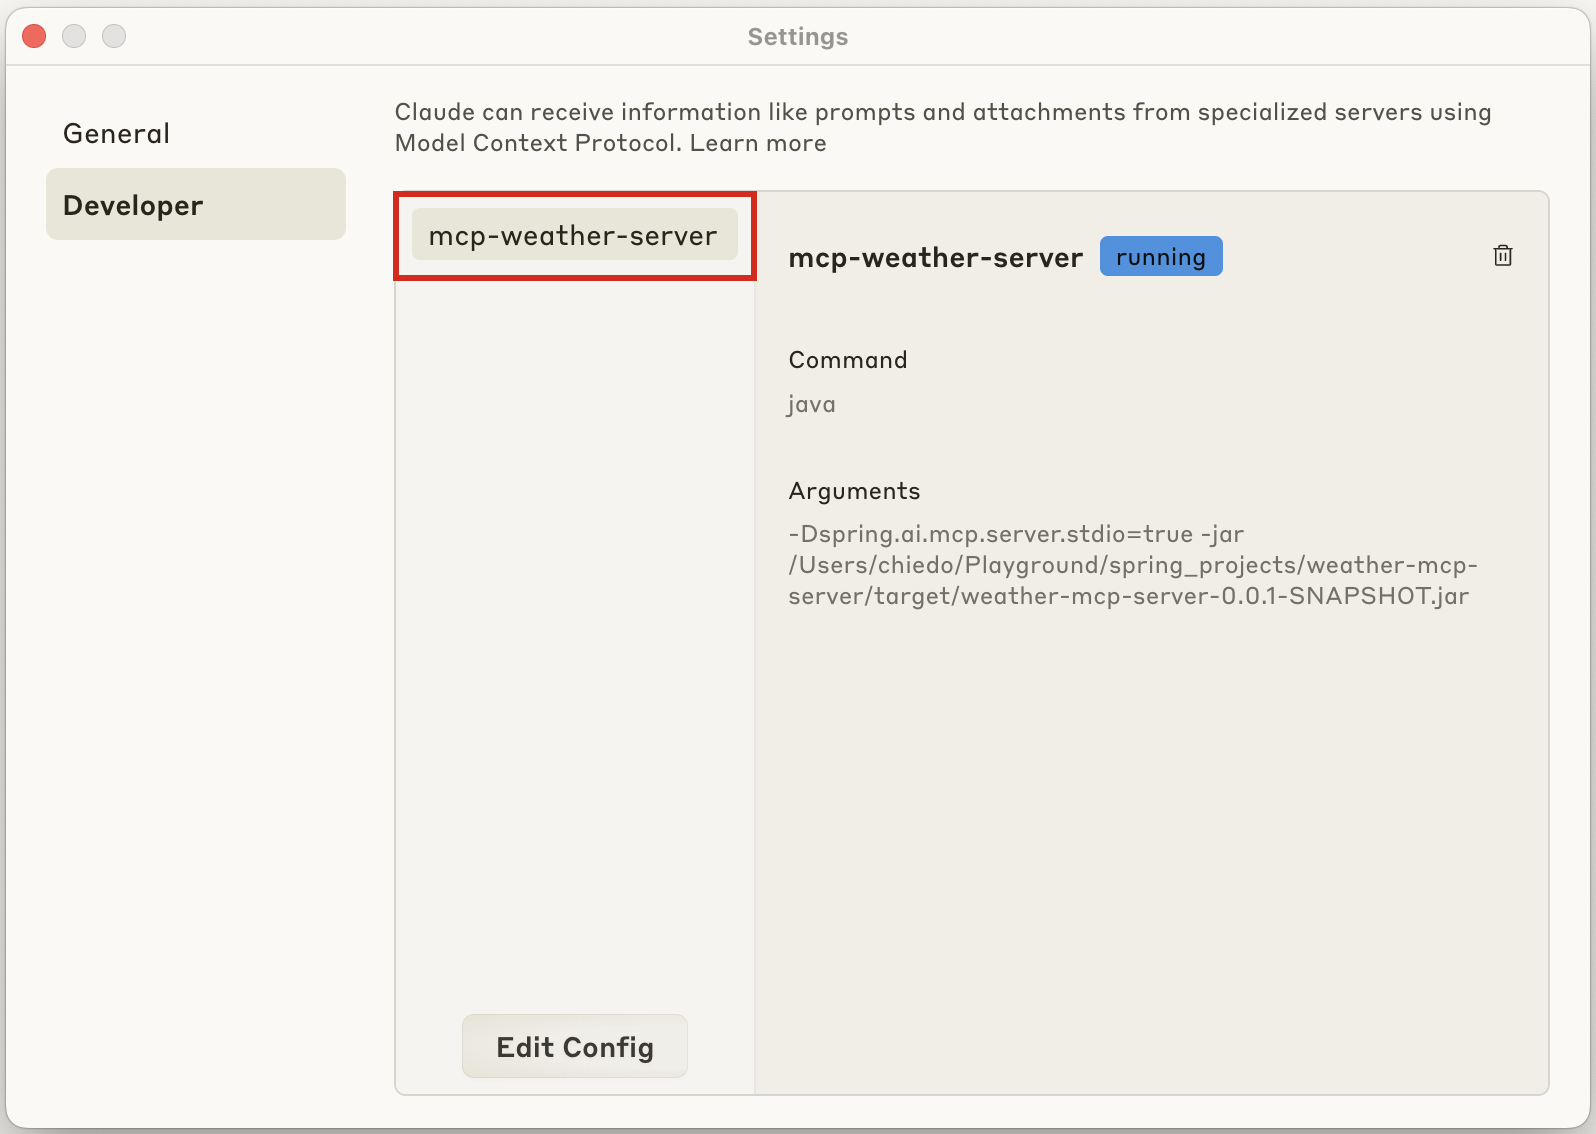
After restarting Claude Desktop, you can go back to Settings and you’ll now see the MCP server listed as shown below:
Also, you can see the server when you click the search and tools button:
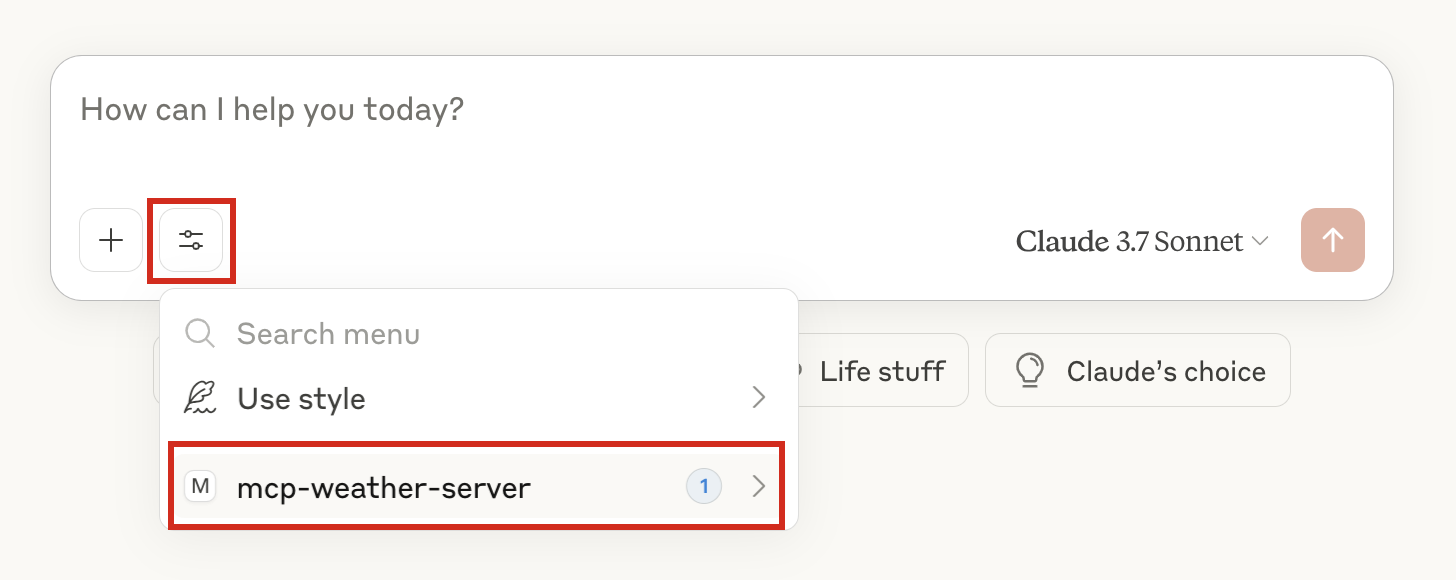
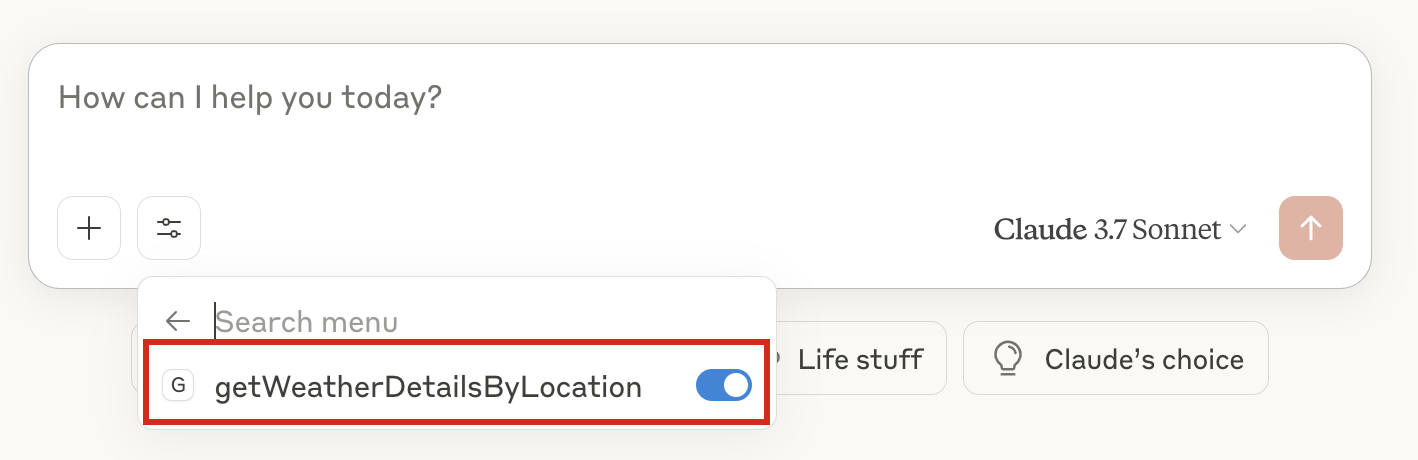
When you click the mcp-weather-server drop-down menu, you’ll see the getWeatherDetailsByLocation tool that was defined in the weather service:
Testing the server with Claude for Desktop
Now that the server is integrated with Claude for Desktop, we can interact with it.
Note: The server uses STDIO transport mode and is typically started automatically by the client.
Example prompts for Claude Desktop
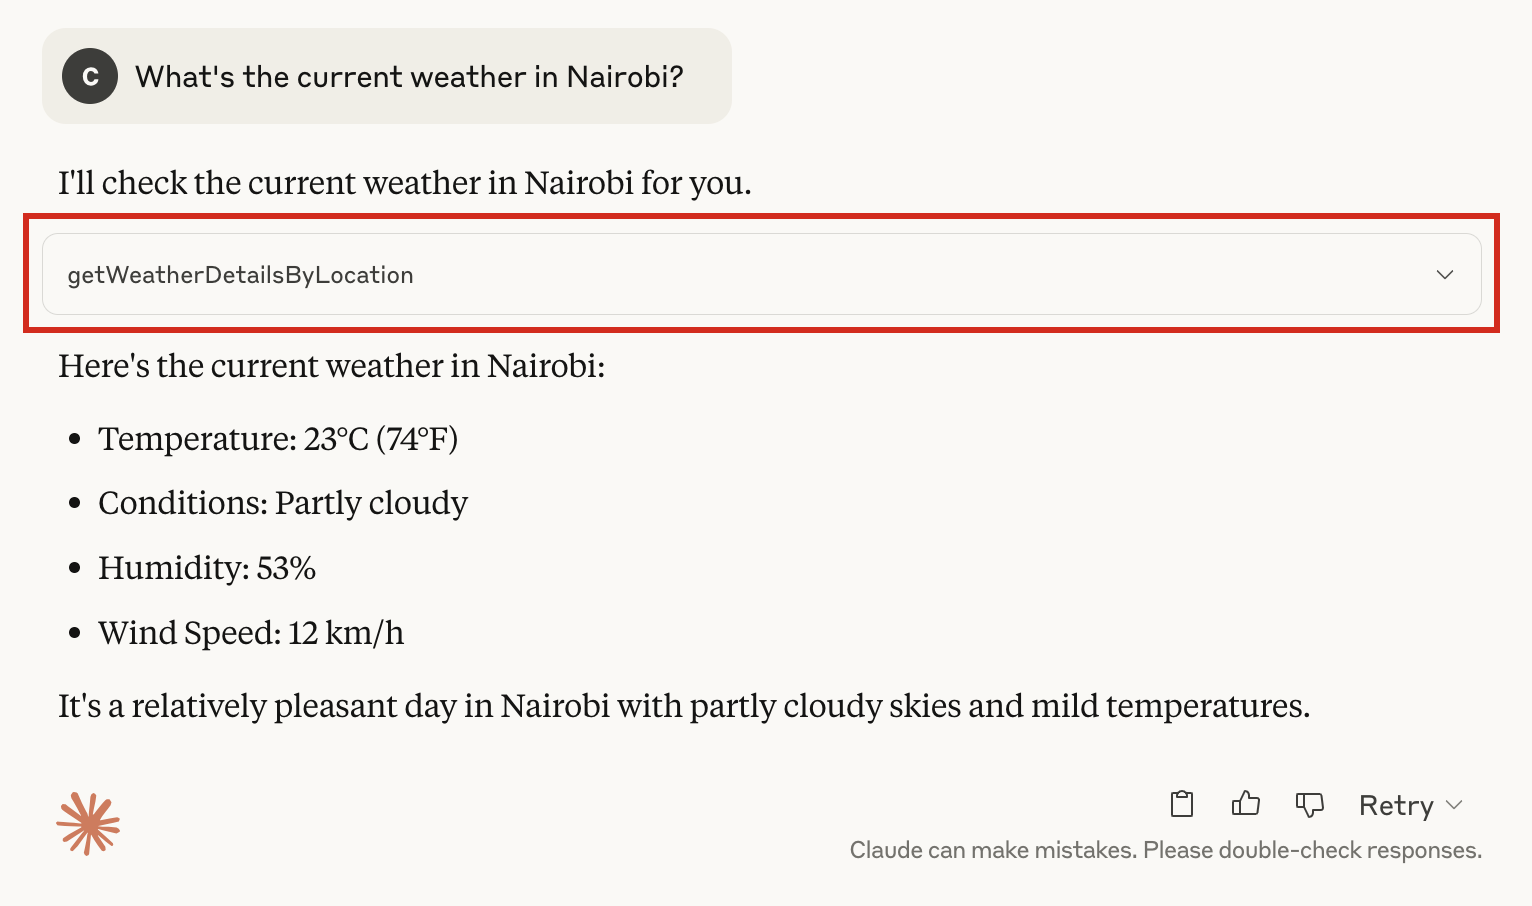
Once connected, you can ask Claude to use the getWeatherDetailsByLocation tool:
- “What’s the current weather in Nairobi?”
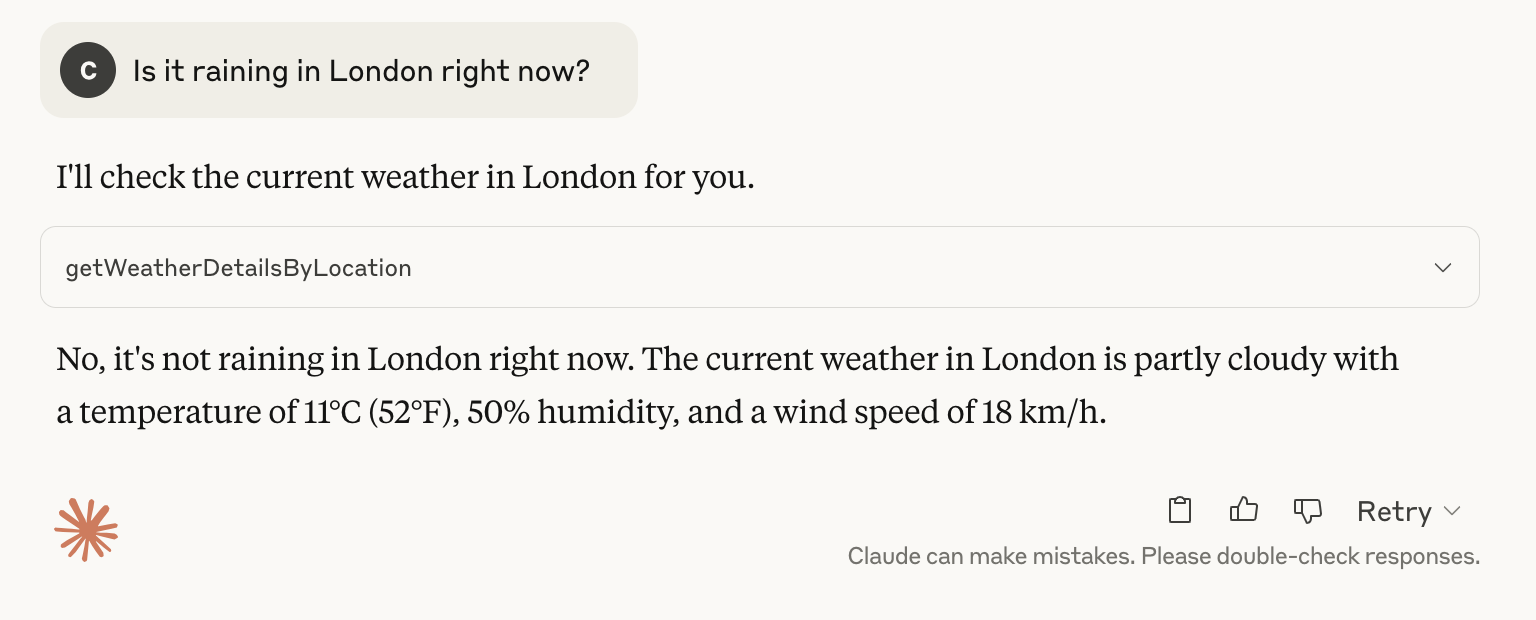
- “Is it raining in London right now?”
- “Tell me the temperature in Paris right now.”
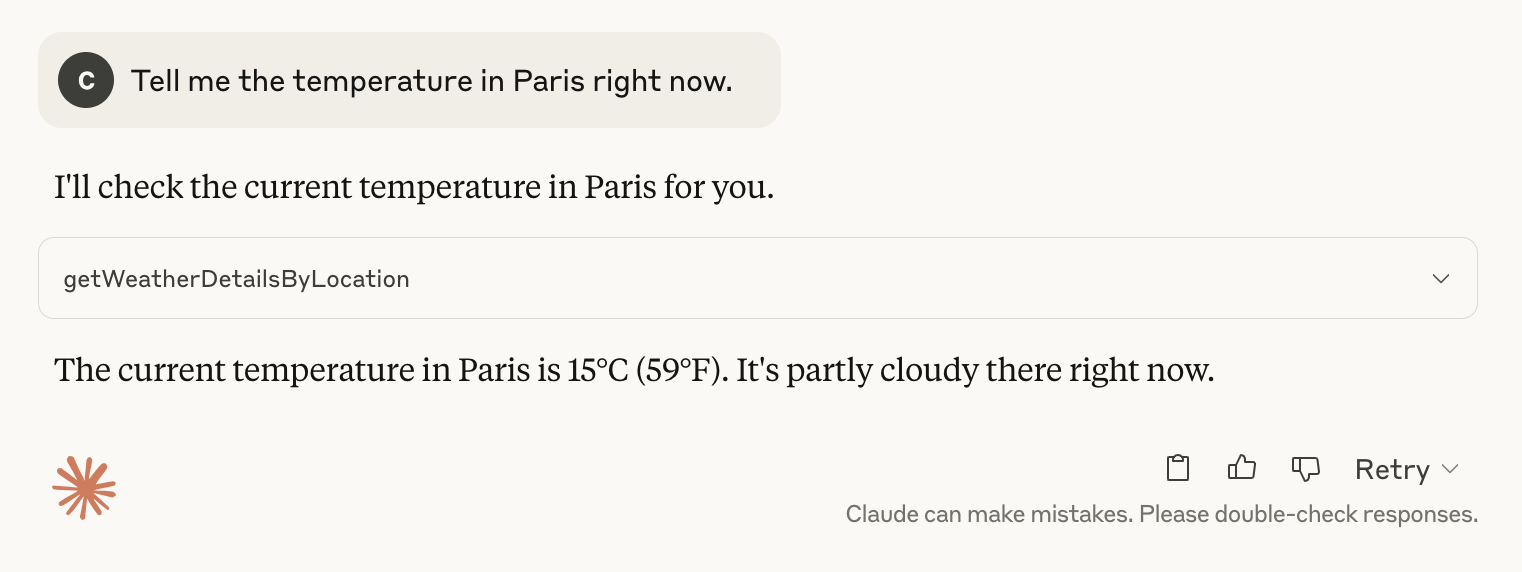
Note: The prompts above were issued on 4th May 2025.
Summary
In this tutorial, we have successfully built a server that implements the Model Context Protocol to provide a tool that fetches weather data from the wttr.in API. When Claude or another MCP client connects to this server, they can use the getWeatherDetailsByLocation tool to retrieve current weather conditions for any location.
Further Resources
Here are some additional resources you can explore: