How to deploy a Spring Boot application on a local Kubernetes cluster with minikube
In this guide, we will look at how to deploy a Spring Boot application to a local Kubernetes cluster using minikube. We are going to deploy a simple REST API application built using the Spring Boot framework.
Understanding the Book REST API application
The Book REST API project is a simple Spring Boot application built using the Spring Boot framework. The API allows one to perform the usual CRUD (Create, Read, Update, and Delete) operations on a collection of books stored in an in-memory database.
Project Dependencies
| Dependency | Purpose |
|---|---|
| Spring web | Build RESTful web services |
| Spring Data JPA | Data persistence and ORM capabilities |
| H2 Database | In-memory database |
| Flyway | Enable database schema migrations |
| ModelMapper | Domain <-> Entity Object mapping |
| Lombok | Reduce writing boilerplate code |
| Spring Security | Authentication + Authorization functionality |
| Spring Actuator | App metrics and monitoring capability |
| Springdoc-openapi | Swagger documentation (OpenAPI 3.0) |
| Hibernate Validator | Bean/Object validation |
The source code for the application is available on GitHub.
Note: The project uses Spring Boot 3.4.0 and Java 21.
Interacting with the application locally
There are a few different ways of running the app locally.
The first step is to clone the project:
$ git clone https://github.com/chrischiedo/books-rest-api-spring-boot.git
Option 1:
After cloning the project, change into the project’s root directory and then build and run the project using the Spring Boot Maven plugin:
$ cd books-rest-api-spring-boot
$ ./mvnw spring-boot:run
Note: In this case, we are using the Maven wrapper(mvnw) that allows you to run Maven commands without installing Maven locally.
You can then access the API at http://localhost:8080/

Option 2:
You can build a jar file and execute it from the terminal:
$ ./mvnw clean package
$ java -jar target/bookApi-0.0.1-SNAPSHOT.jar
You can then access the API at http://localhost:8080/
Option 3:
You can open the project in your favorite Java IDE and run it from there.
Checking out the API documentation
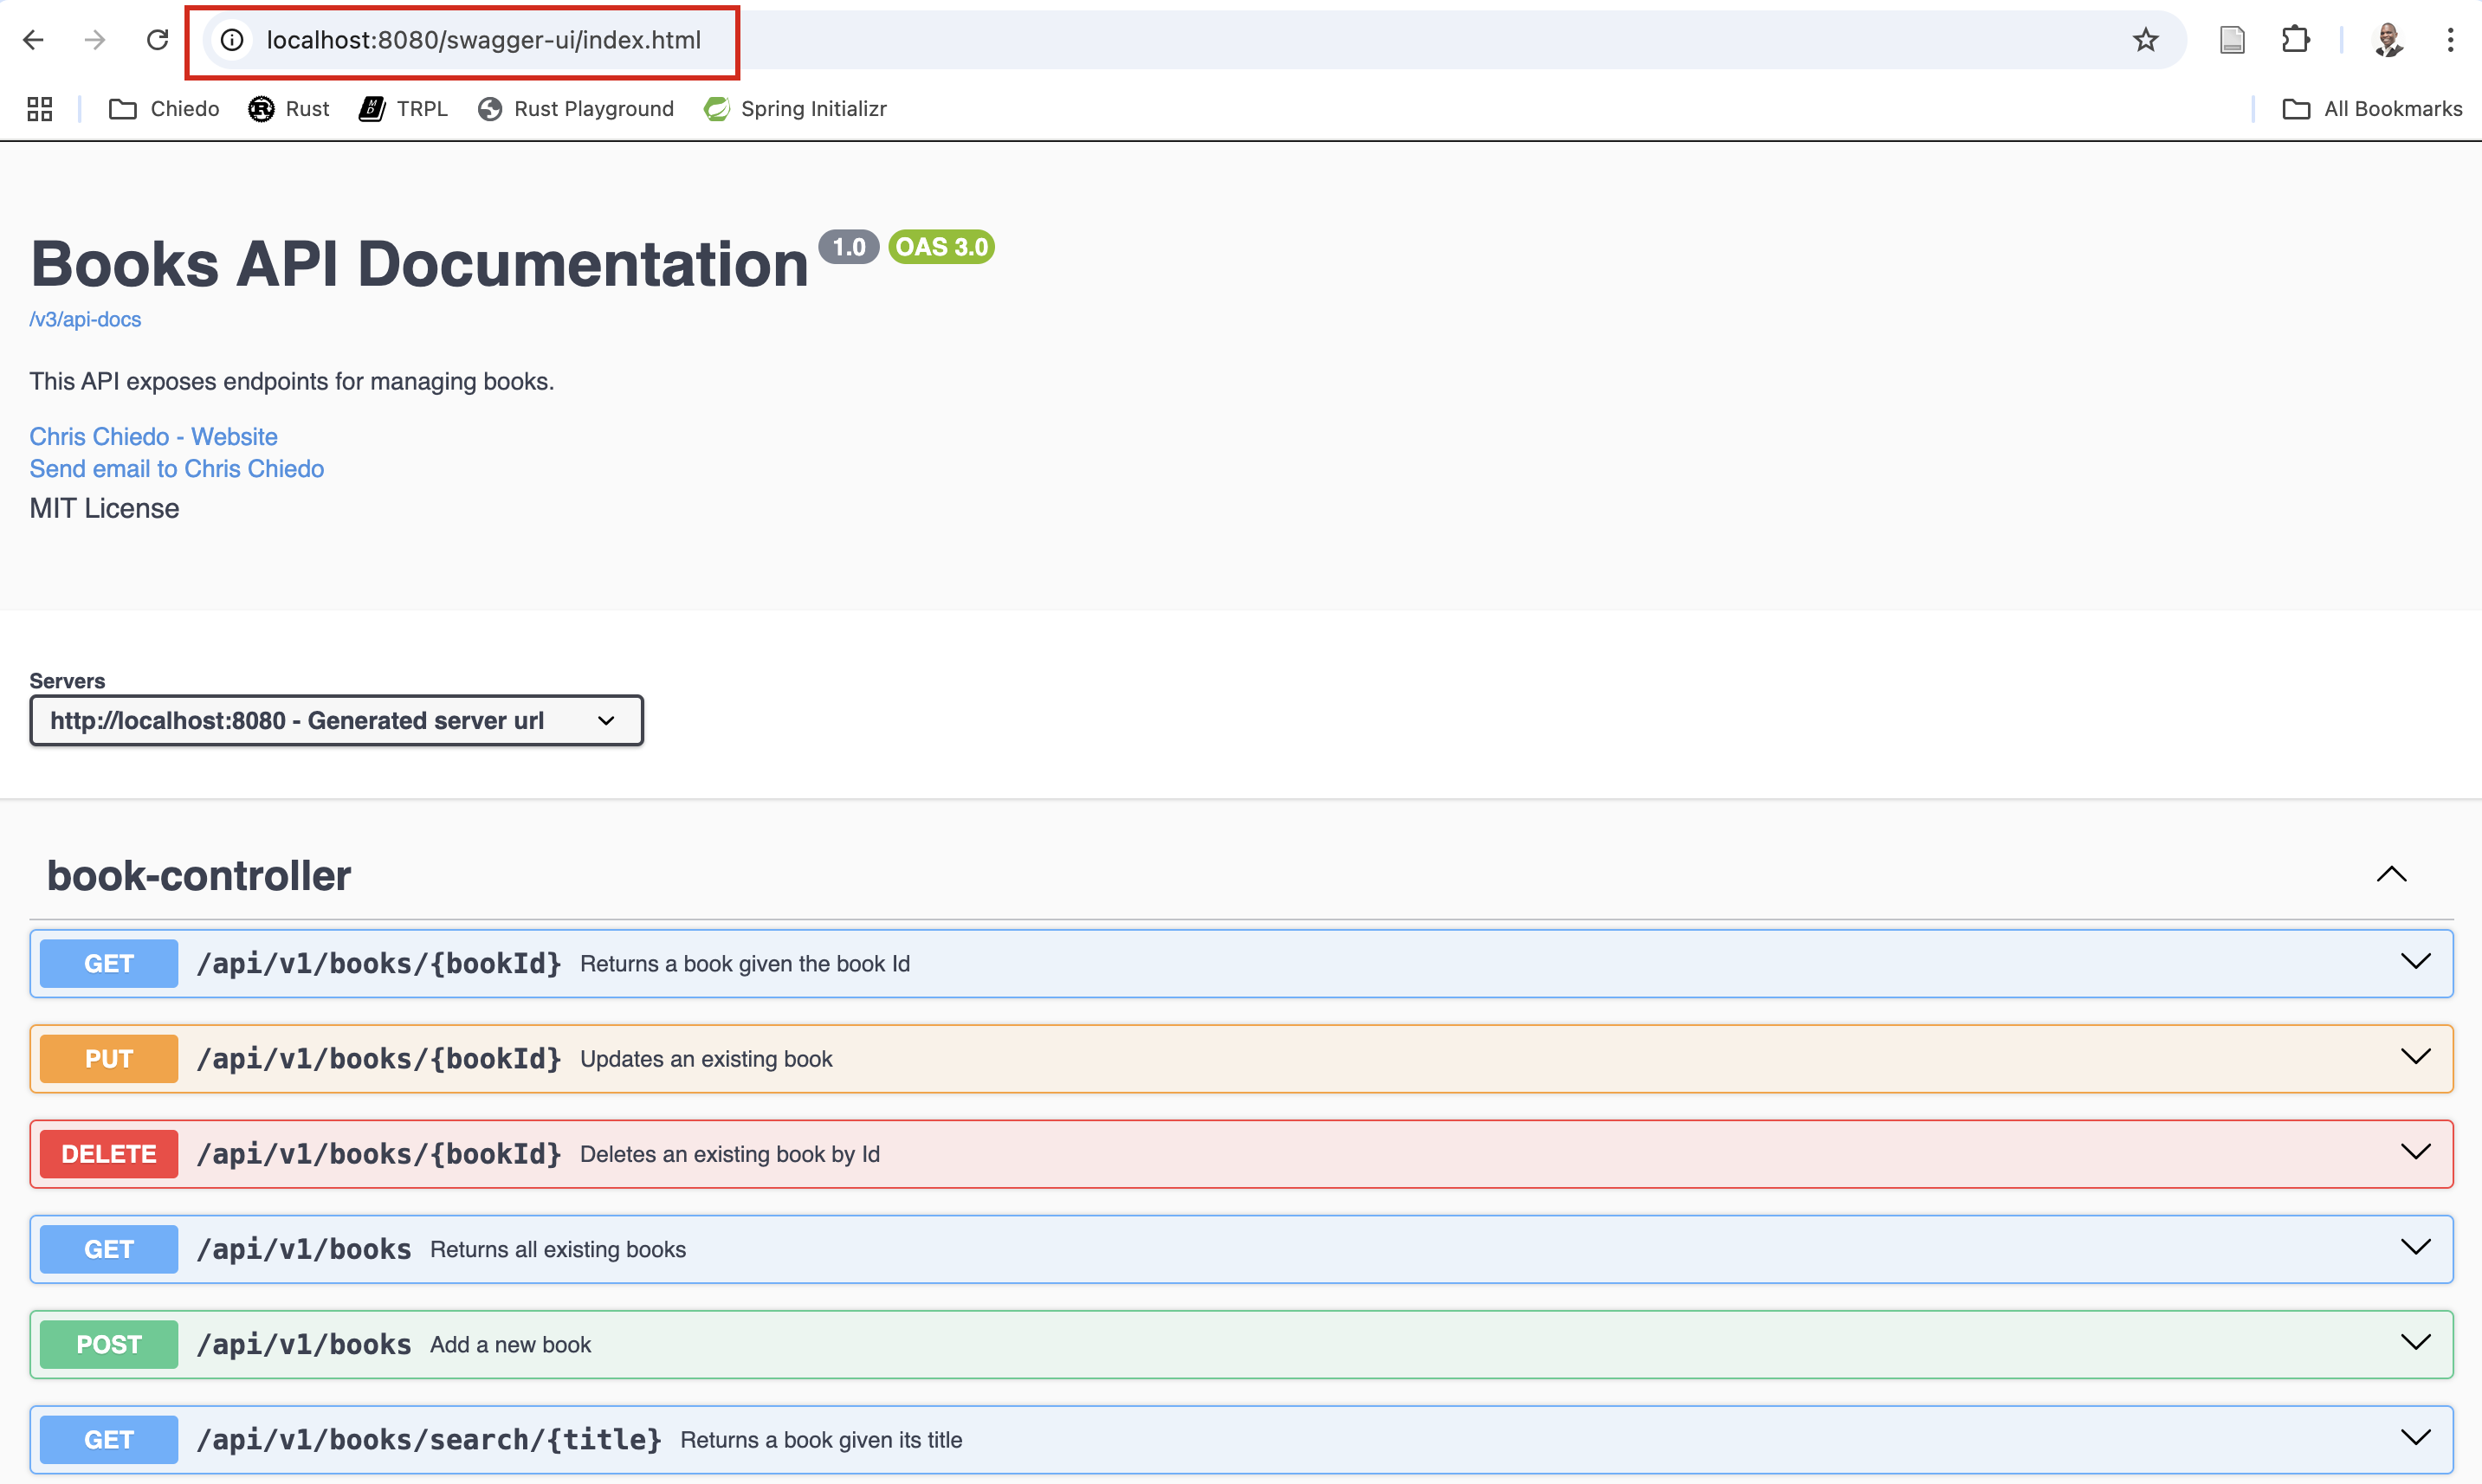
You can access the API documentation at http://localhost:8080/swagger-ui/index.html
Sample API requests using Postman
You can test out the API using a REST client app like Postman.
Note: You can also use curl or httpie as alternatives to Postman.
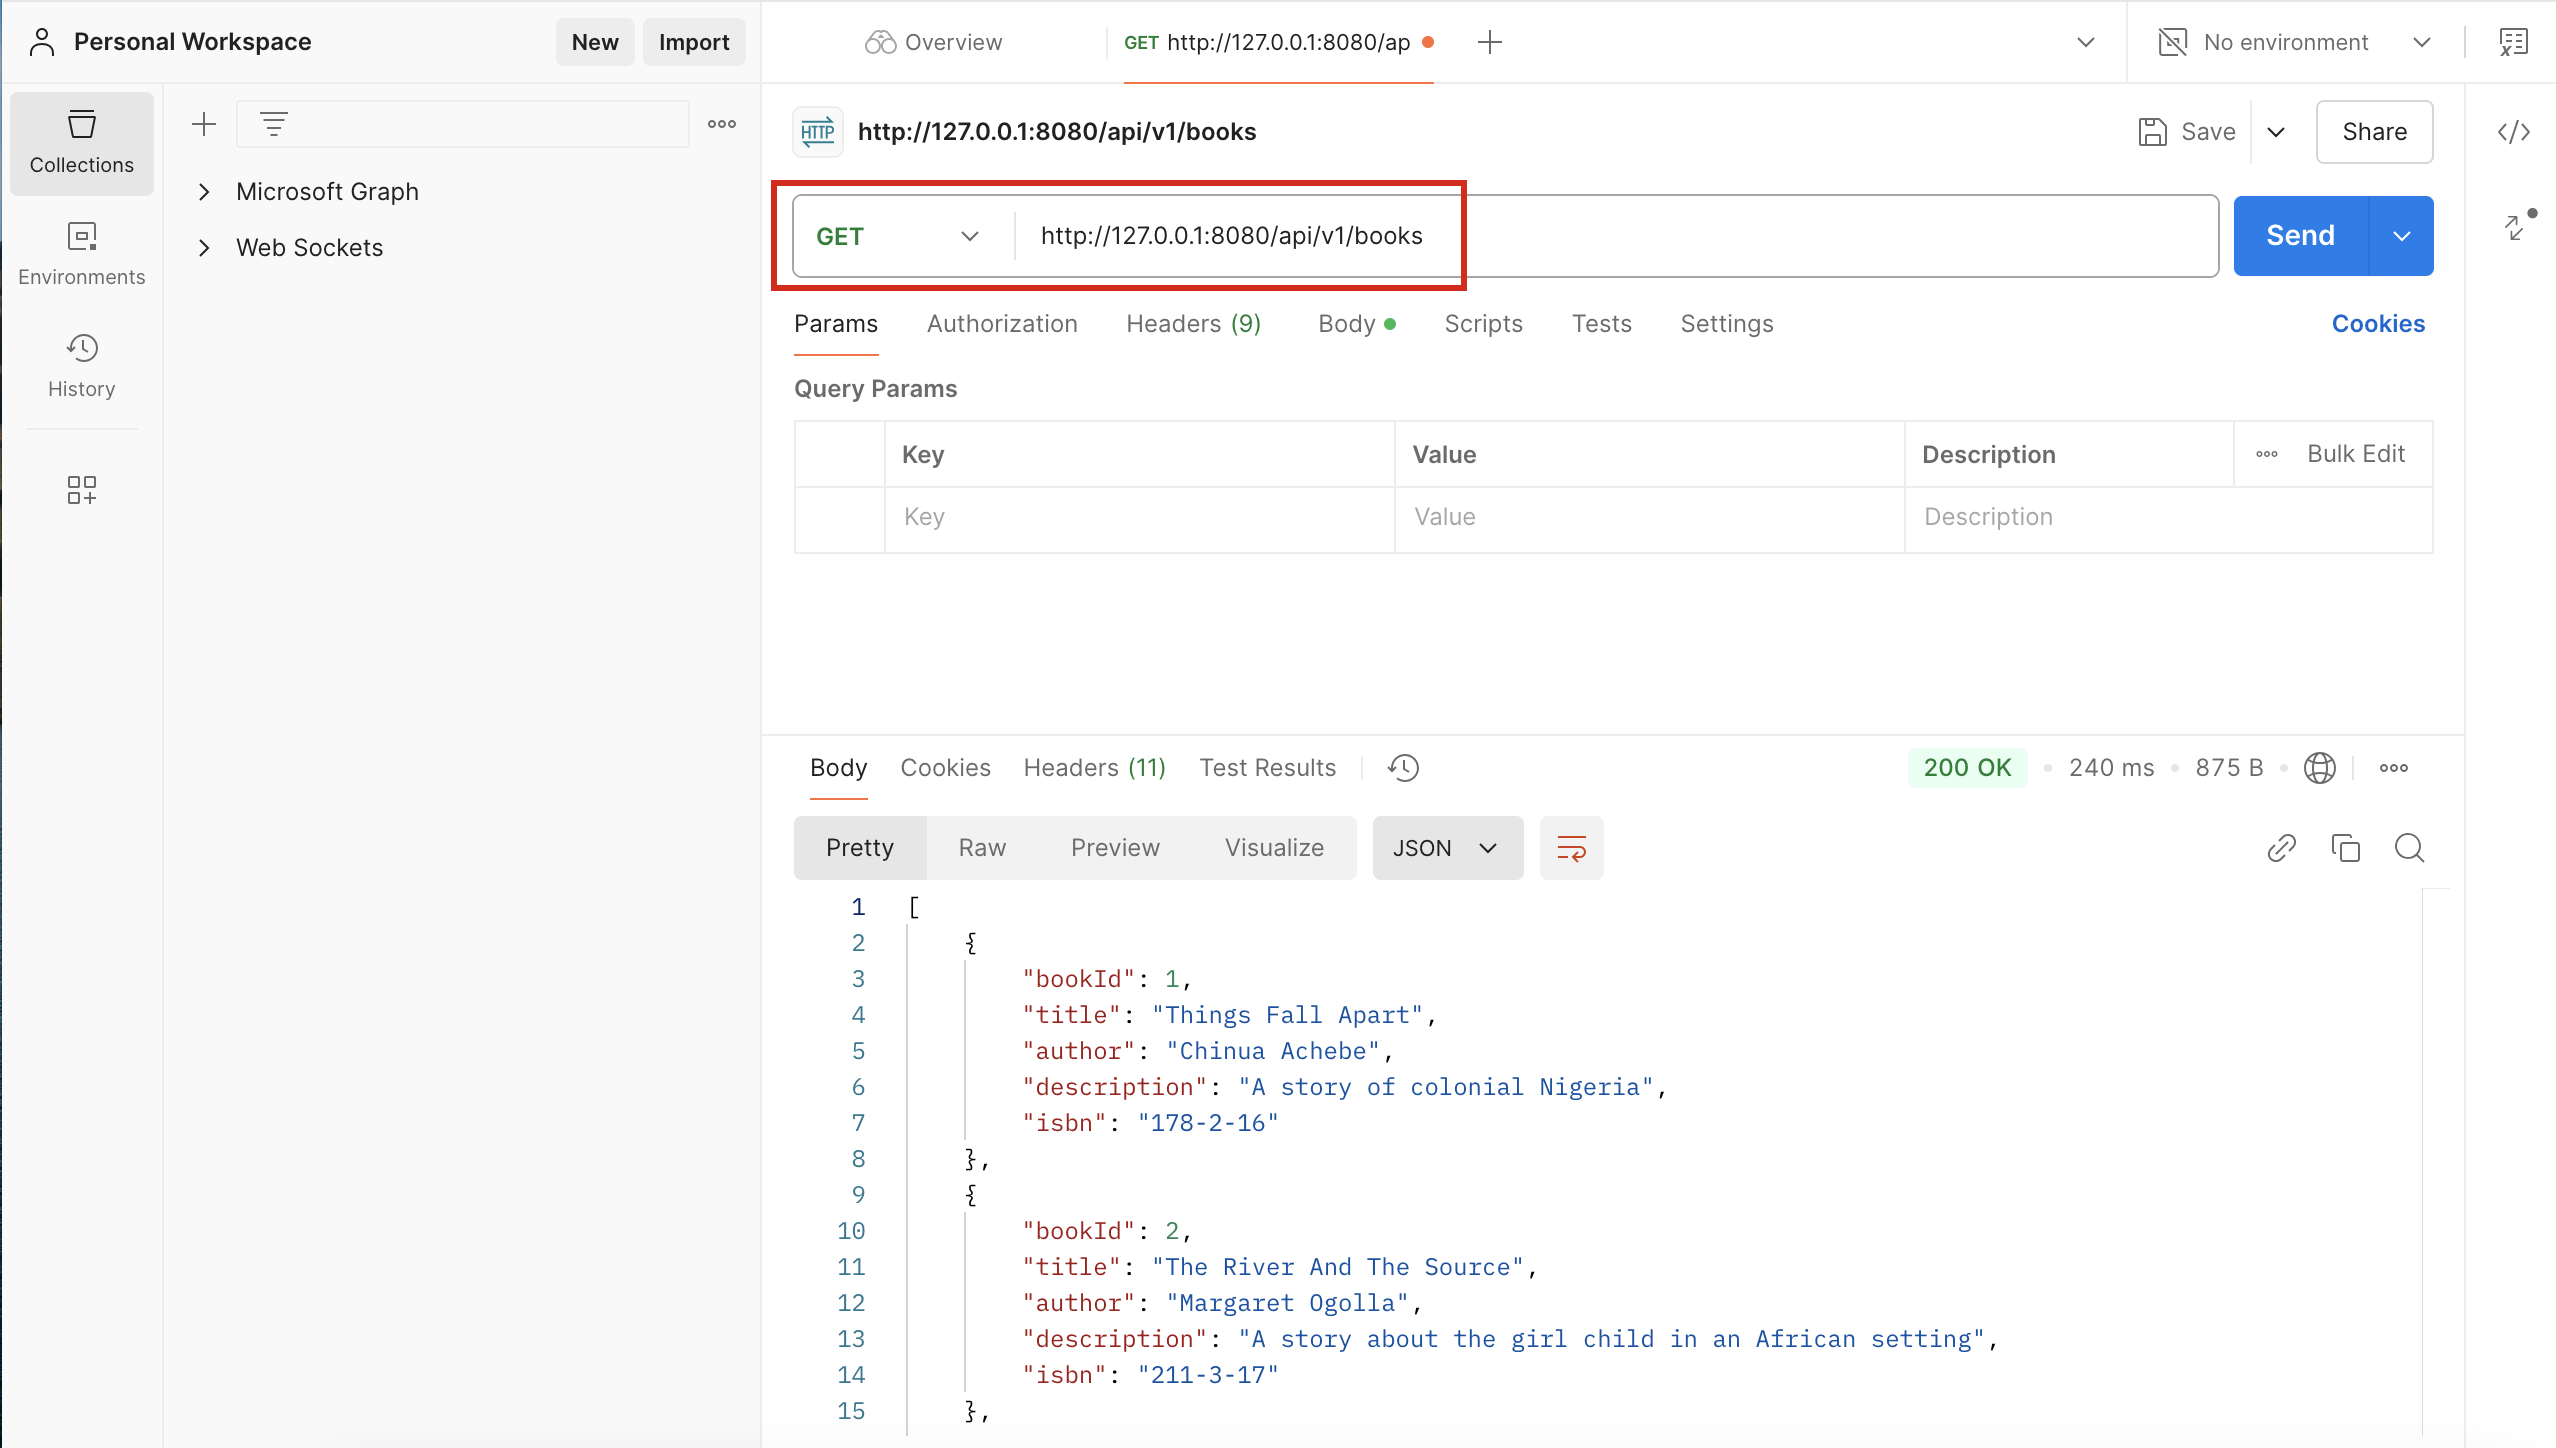
GET /api/v1/books
Querying for all books:
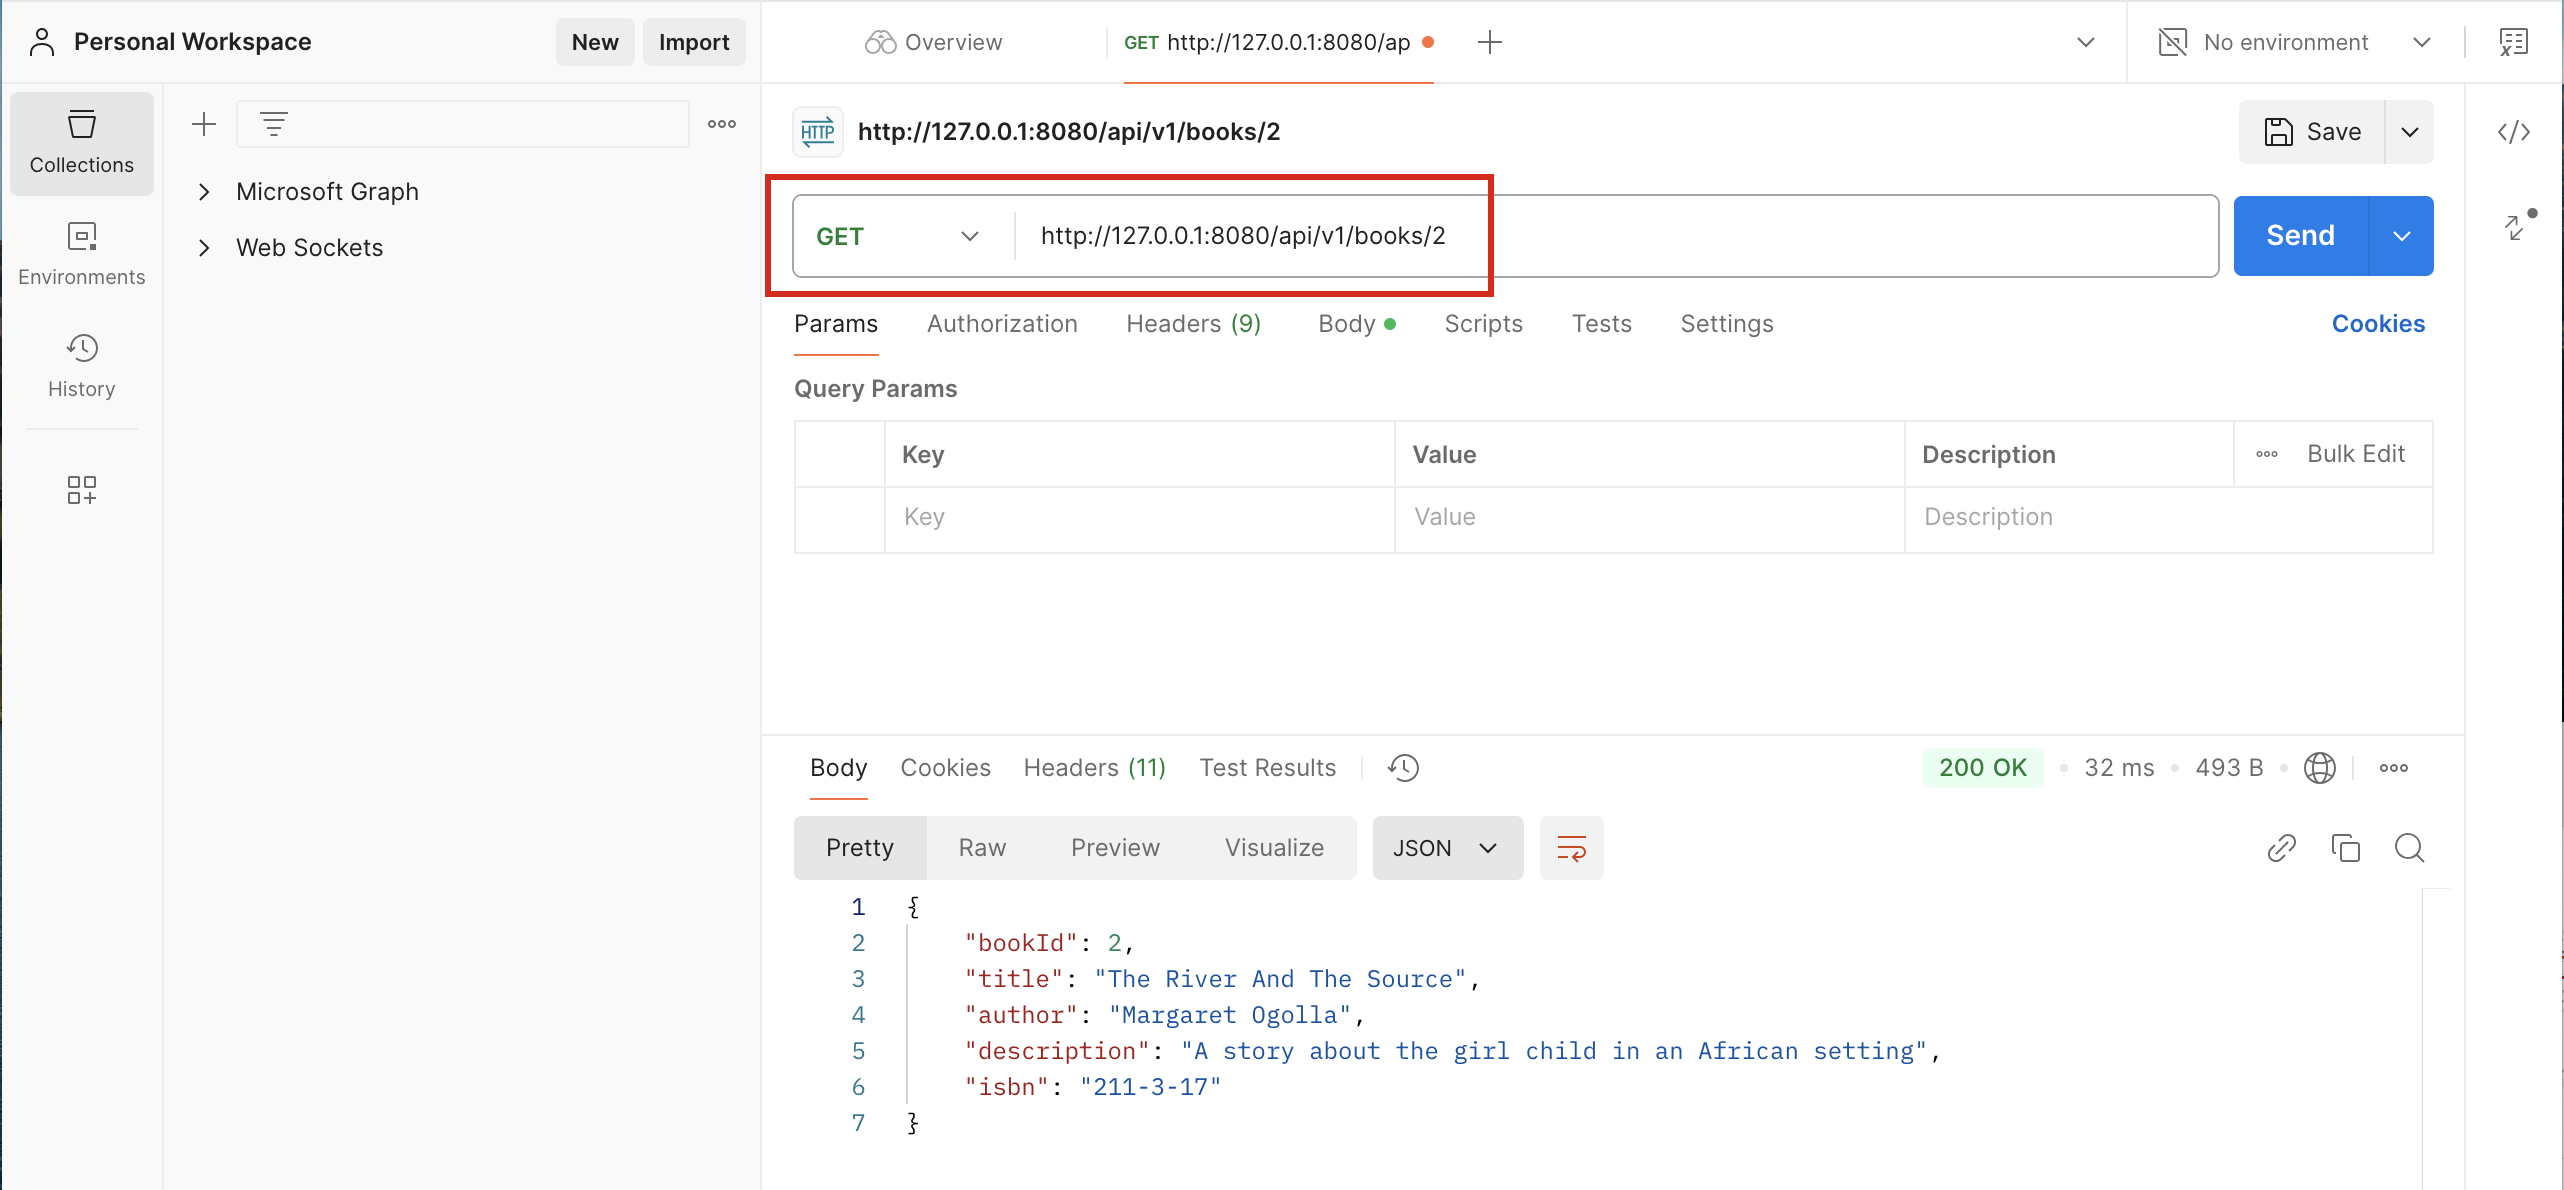
GET /api/v1/books/2
Querying for a particular book by its id:
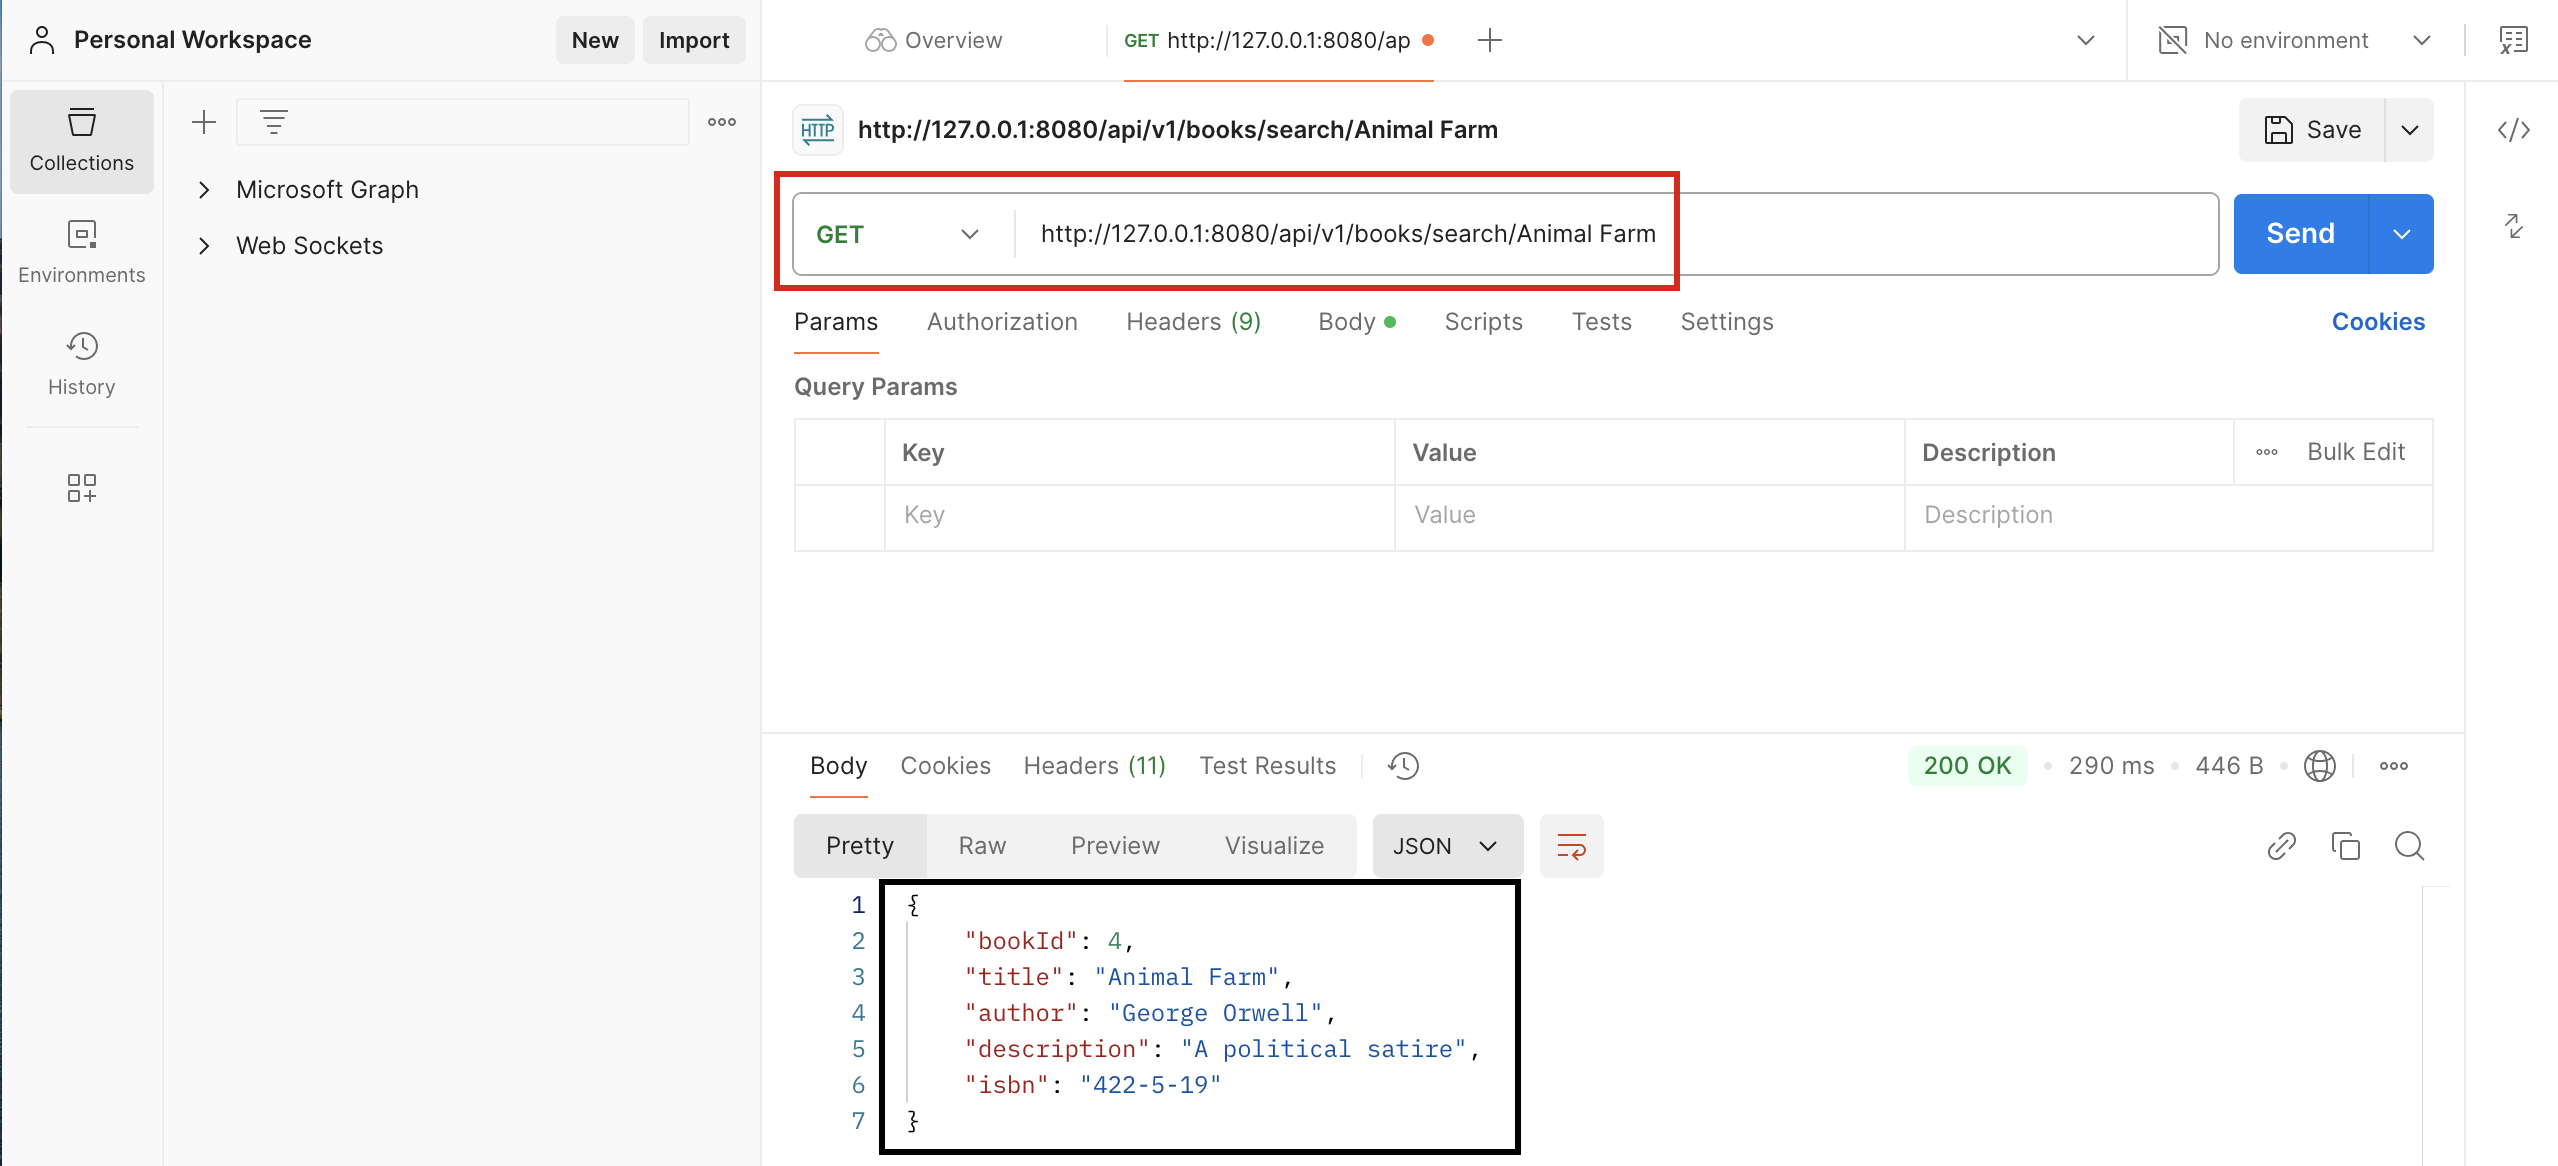
GET /api/v1/books/search/Animal Farm
Searching a book by its title:
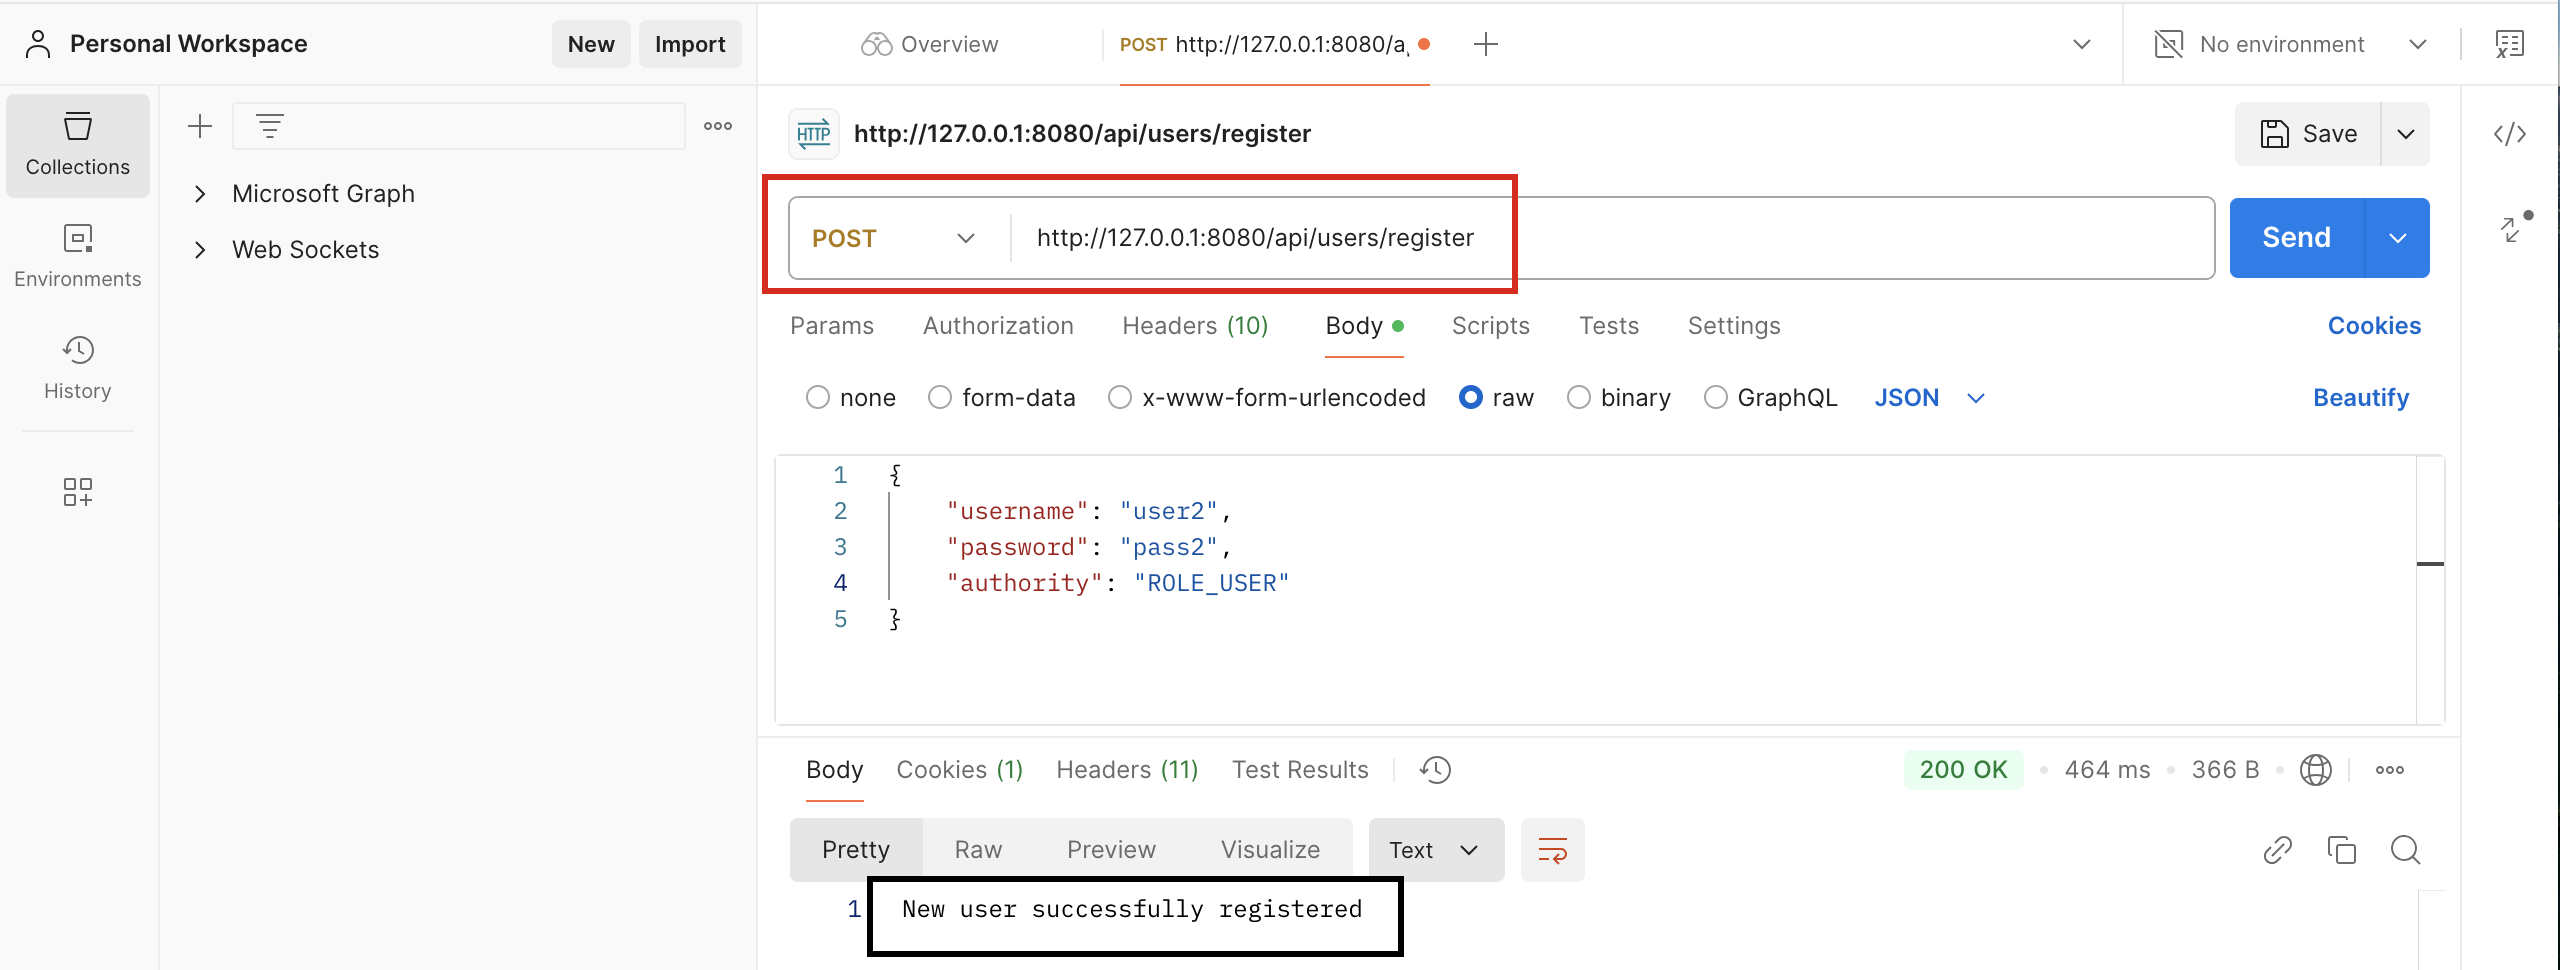
POST /api/users/register
Registering as a new user:
You can play around with the rest of the endpoints on your own.
Deploying the application to a local Kubernetes cluster
In order for you to deploy the app to a locally hosted Kubernetes cluster, you’ll need to install the following tools:
- Docker container runtime: allows you to work with Docker containers on your local machine. Check Get Docker to download Docker Desktop for your specific platform.
minikube: lets you run a Kubernetes cluster locally. Check minikube start for installation instructions for your specific platform.kubectl: The Kubernetes command-line tool that allows you to run commands against a Kubernetes cluster. Check kubectl for installation instructions for your specific platform.
Build a docker container image for the application
There are a few approaches to creating a docker container image for a Spring Boot application:
- Using a Dockerfile (this is the option we’ll use here)
- Using the Spring Boot Maven plugin (which uses cloud-native buildpacks).
$ ./mvnw spring-boot:build-image - Using Jib. Here’s a Quickstart for using the Jib Maven plugin.
Create a Dockerfile
Here is a sample Dockerfile for the application:
Note: Create the file in the root directory of the project:
$ touch Dockerfile.
FROM openjdk:21-jdk-slim
WORKDIR /app
COPY target/bookApi-0.0.1-SNAPSHOT.jar booksrestapi.jar
EXPOSE 8080
ENTRYPOINT ["java", "-jar", "booksrestapi.jar"]
Note: We are using the
jarfile that was created from the build process (when we run./mvnw clean package). The jar file bundles all the dependencies together, including an embedded app server (Tomcat in this case). This is what is sometimes referred to as an “uber/fat” jar file. While we’re using the fat jar file here, it often doesn’t result in efficient container images. In order to make it easier to create optimized Docker images, Spring Boot supports a layering approach by adding a layer index file (layers.idx) to the jar. Check out Packaging Layered Jar or War for more on this approach.
Containerize the app
We can now build a docker image from the Dockerfile created above. From the project’s root directory (where the Dockerfile is located), execute the following command:
$ docker build -t books-rest-api .
Note the period(.) at the end (means current directory where the Dockerfile is located).
At this point, you can run the containerized app by using the following command:
$ docker run -p 8080:8080 books-rest-api
You can then access the API at http://localhost:8080/

Start a local Docker image registry
In order to deploy the application on Kubernetes, you need to publish the image on a container registry, because this is where Kubernetes pulls images from. You have two options here:
- Set up a local image registry (what we’ll use in this guide)
- Use Docker hub
Run the following command to create a local Docker image registry to work with:
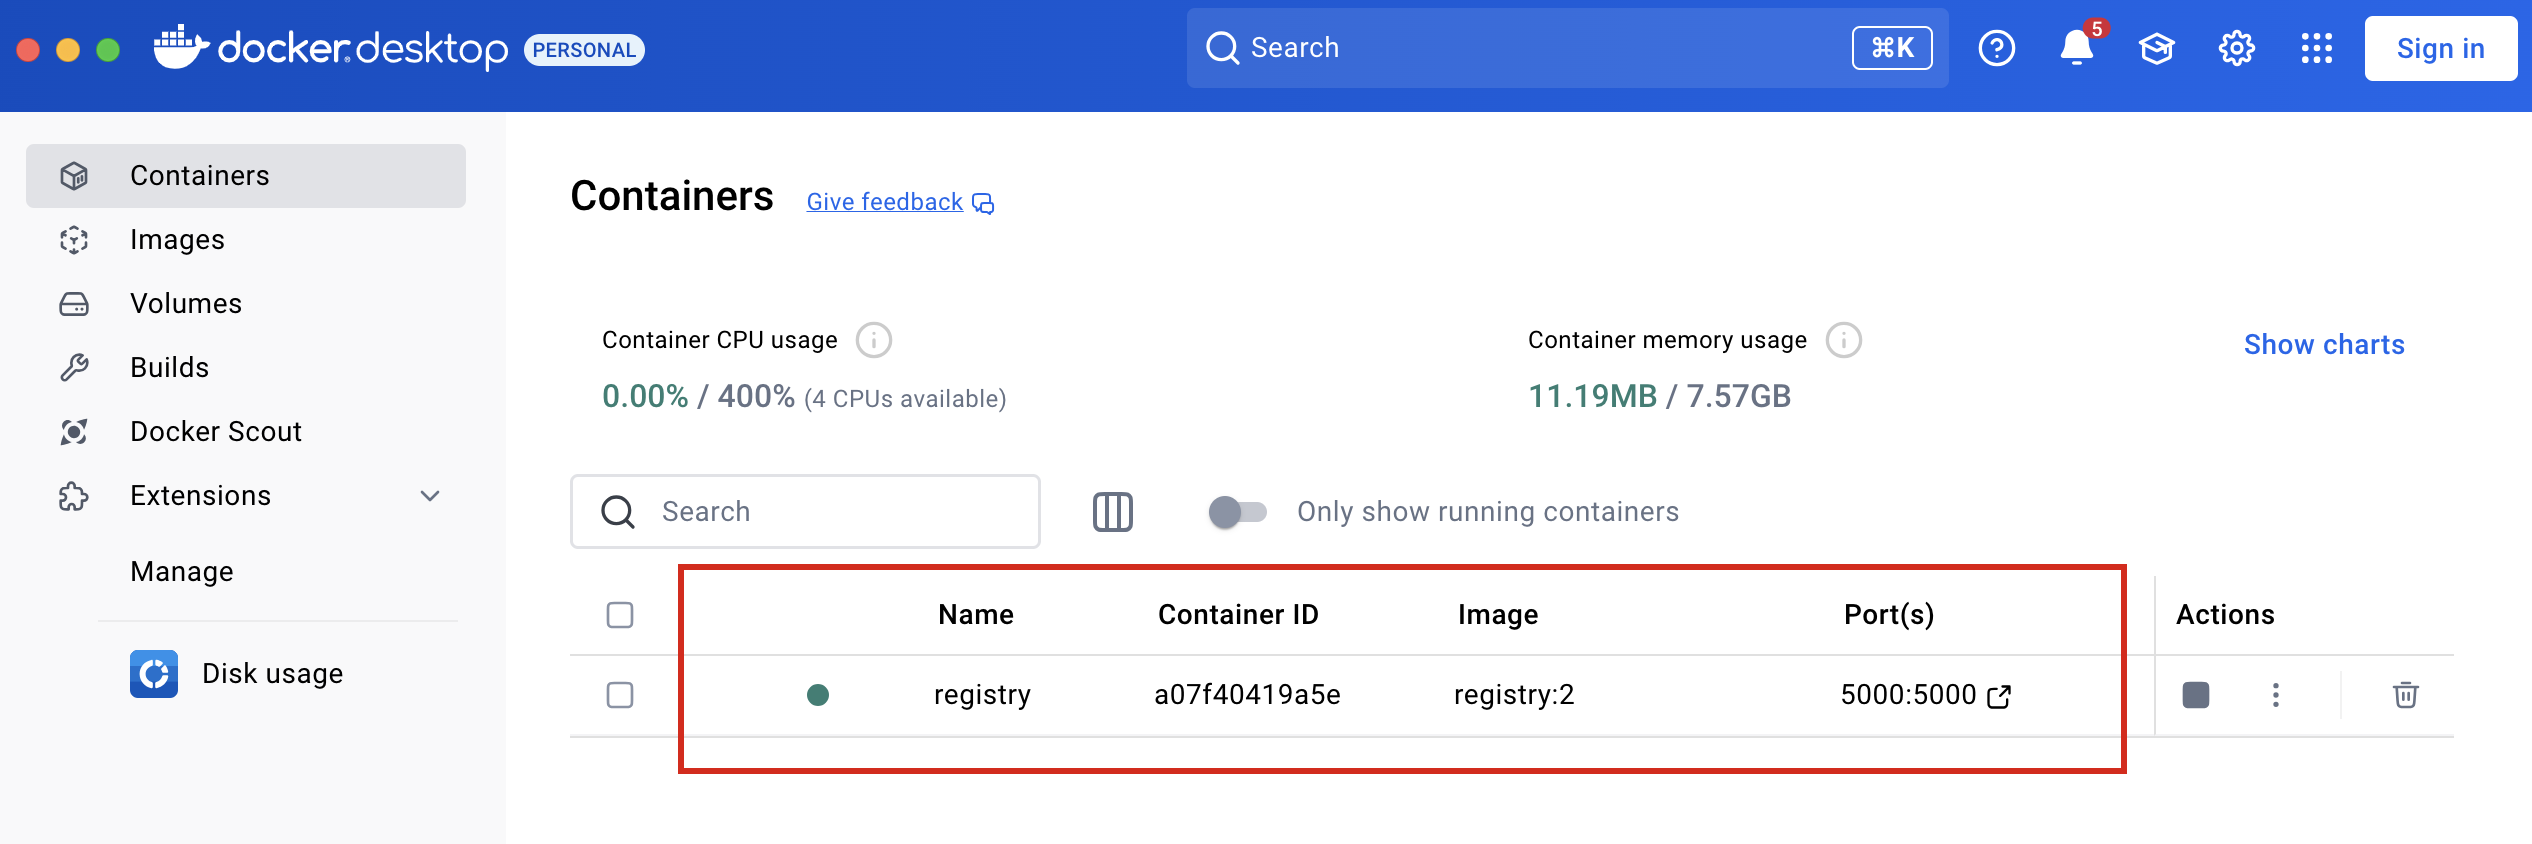
$ docker run -d -p 5000:5000 --restart=always --name registry registry:2
A containerized image registry is now running locally on port 5000:
Push the image to the local container registry
Run the following commands to tag and push the container image to the local registry:
$ docker tag books-rest-api localhost:5000/books-rest-api:1.0

$ docker push localhost:5000/books-rest-api:1.0
Note: If you were using Docker hub instead, then the commands would be as follows (where
{docker-id}is your Docker hub username):
$ docker tag books-rest-api {docker-id}/books-rest-api:1.0

$ docker push {docker-id}/books-rest-api:1.0
Start a local Kubernetes cluster
Use the following command to start a local Kubernetes cluster using minikube:
$ minikube start
Note: This might take a while for the first time.
Next, we need to allow Kubernetes to read our local docker image registry by executing the command below:
$ eval $(minikube -p minikube docker-env)
You can check the status of the minikube cluster with the following command:
$ minikube status
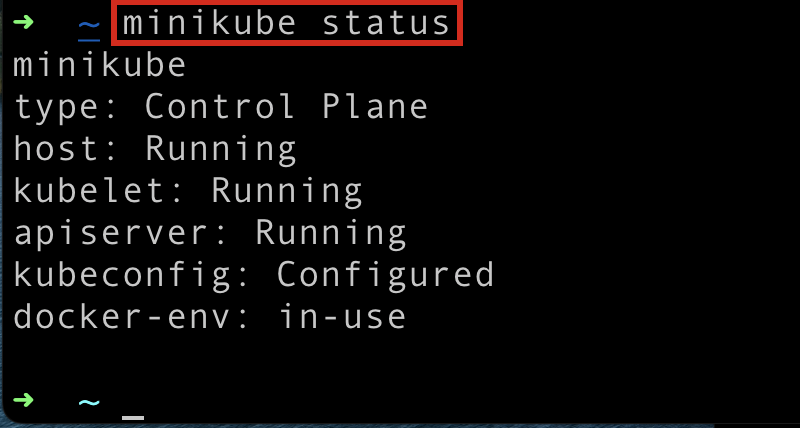
Note the docker-env: in-use line in the output. This indicates that our cluster can interact with our local docker environment.
Note: You can also run
$ kubectl get nodesto confirm that minikube is running an active node:

Create a Kubernetes deployment file
Here’s a sample deployment file (deployment.yaml):
apiVersion: apps/v1
kind: Deployment
metadata:
  name: books-rest-api
spec:
  replicas: 2
  selector:
    matchLabels:
      app: books-rest-api
  template:
    metadata:
      labels:
        app: books-rest-api
    spec:
      containers:
        - name: books-rest-api
          image: localhost:5000/books-rest-api:1.0 # OR {docker-id}/books-rest-api:1.0
          ports:
            - containerPort: 8080
With the deployment file in place, you can run the following command to deploy the application to the cluster:
$ kubectl apply -f deployment.yaml
You can check the deployment status with:
$ kubectl get deployments

Since we set two replicas in our deployment, kubernetes will create two pods/instances for our application. We can get pods’ information using:
$ kubectl get pods

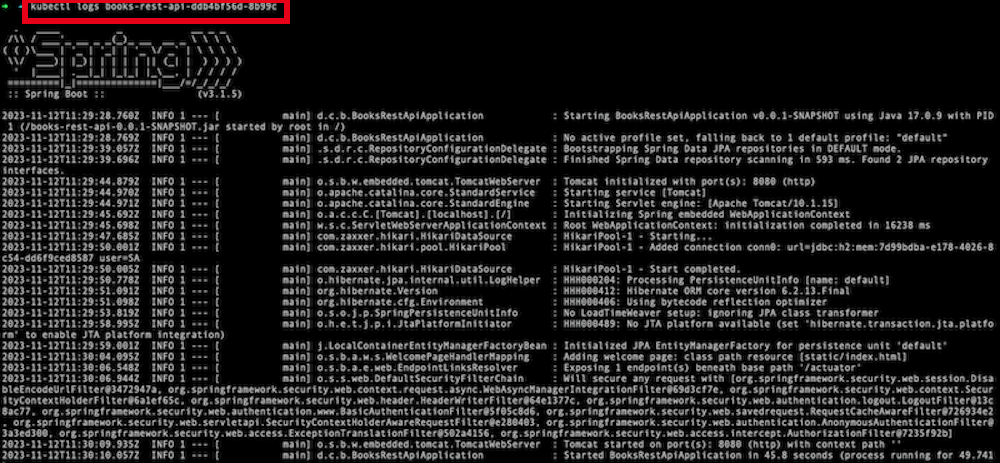
You can check the logs for the running pod(s):
$ kubectl logs books-rest-api-ddb4bf56d-8b99c
Create a Kubernetes service file
We have defined how to run our containerized application in the Kubernetes cluster, but we need to make it accessible from outside the cluster. For that purpose, we need to create a Service by means of a service.yaml file, like the one below:
apiVersion: v1
kind: Service
metadata:
  name: books-rest-api-service
spec:
  type: NodePort
  selector:
    app: books-rest-api
  ports:
    - protocol: TCP
      port: 80
      targetPort: 8080
Note: In a production environment, you would most likely use
LoadBalanceras theServicetype (instead ofNodePort).
We can now expose our app using the following command:
$ kubectl apply -f service.yaml
You can check the service status with:
$ kubectl get services

You can check the services available on the minikube cluster using:
$ minikube service list

Access the application
Our application is running successfully, but we can’t access it from the outside yet. You can expose the service by running the following command:
$ minikube service books-rest-api-service
This will create an SSH tunnel from the pod to your host and open a window in your default browser that is connected to the exposed service.

You can then access the app at http://127.0.0.1:64784/

Check Kubernetes dashboard
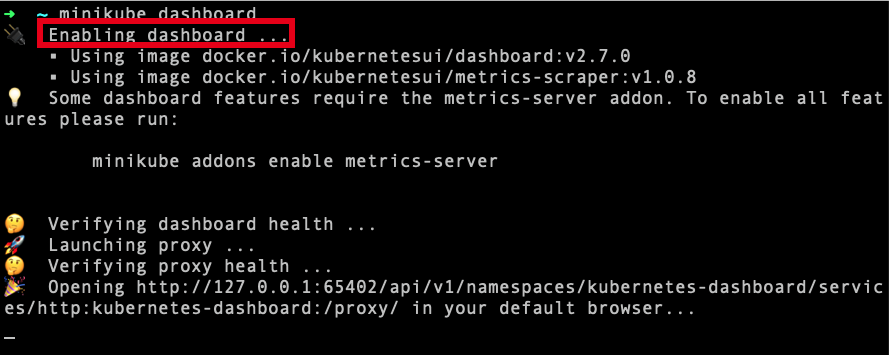
You can open the Kubernetes dashboard by executing the following command:
$ minikube dashboard
Here’s how the dashboard looks like:
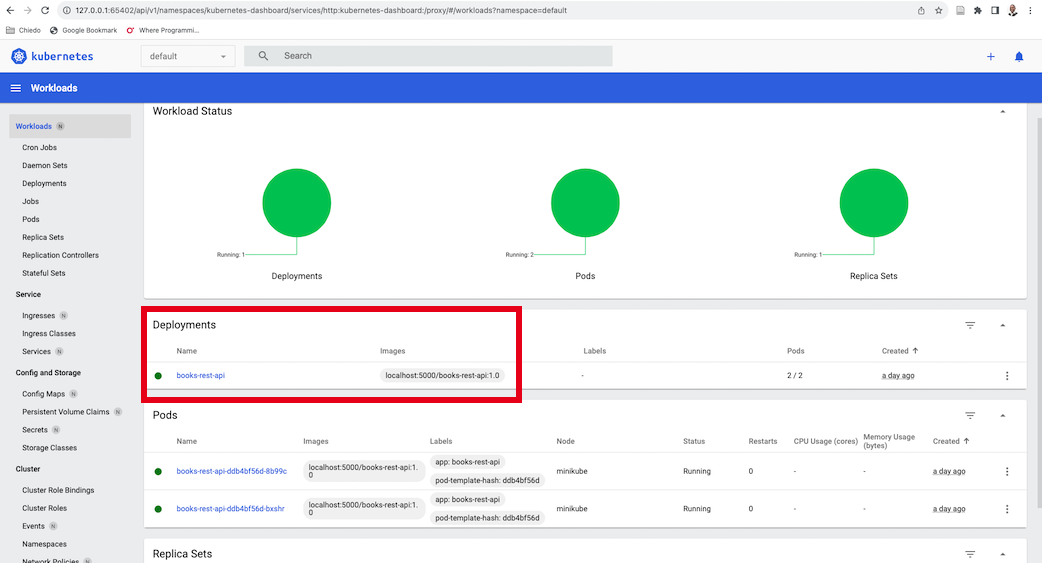
As you can see, the app is up and running on the local Kubernetes cluster.
Sample API calls using Postman
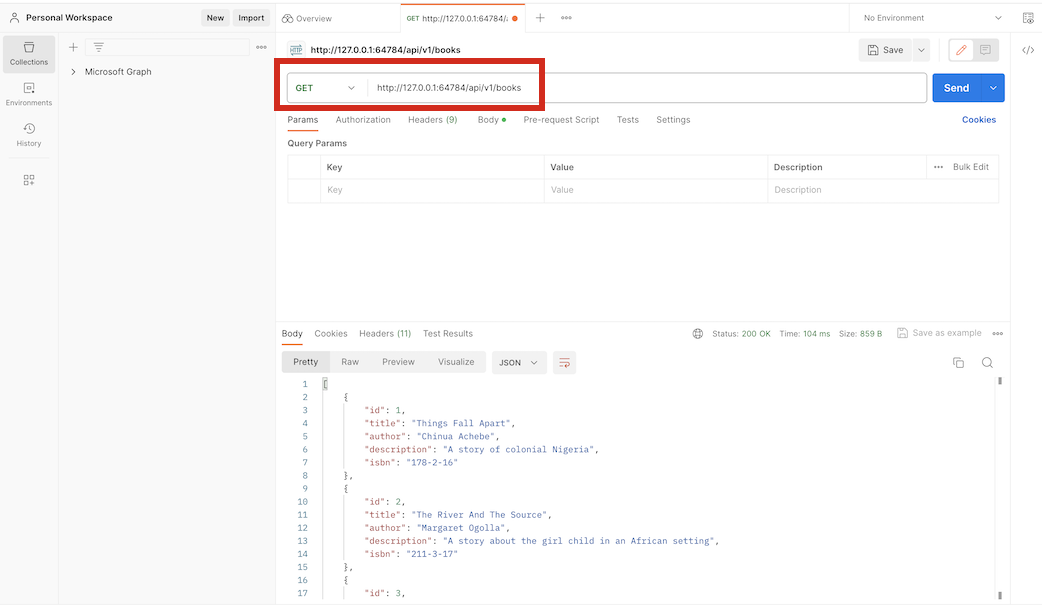
Now that the application is running on the cluster, we can send API requests using Postman.
GET /api/v1/books
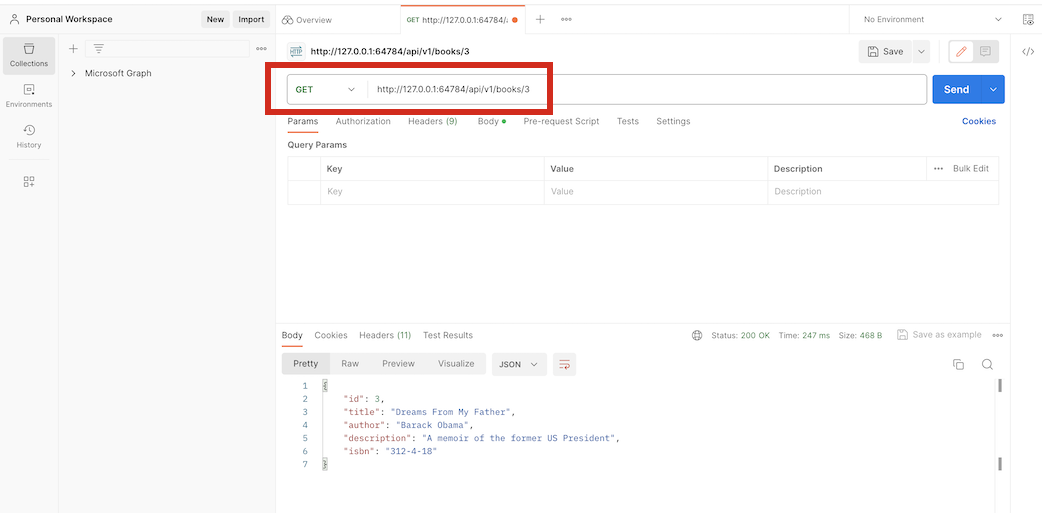
GET /api/v1/books/3
POST /api/users/register
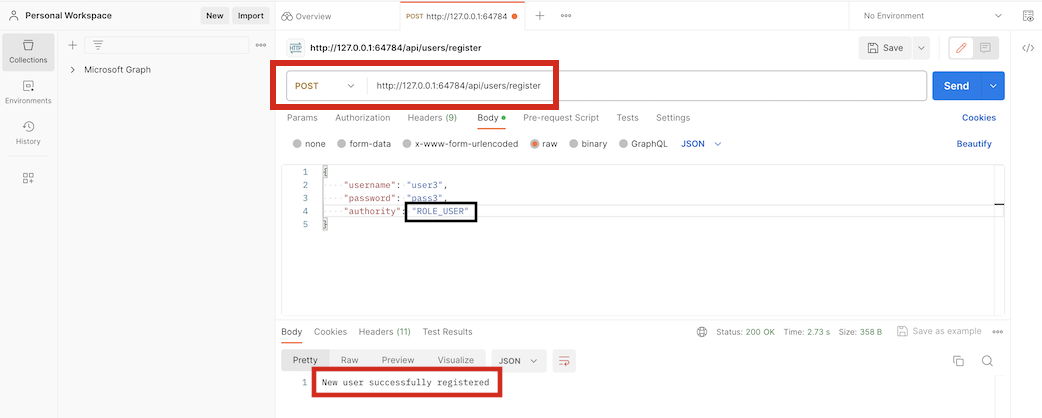
This creates a new user with the role of “USER”.
POST /api/users/register
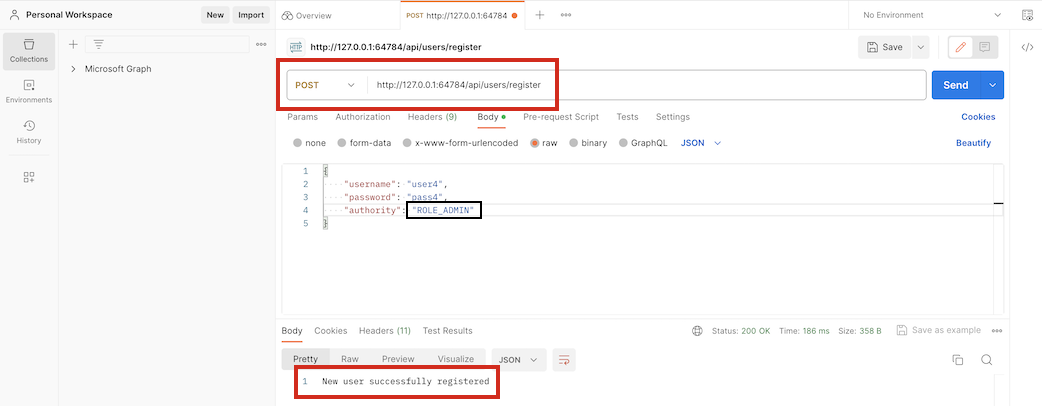
This creates a new user with the role of “ADMIN”.
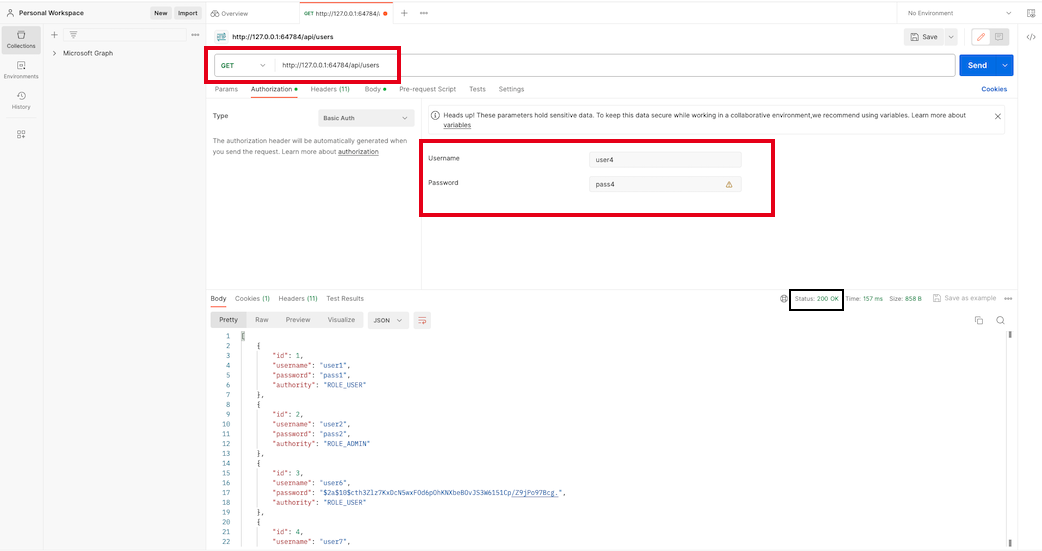
GET /api/users
According to our auth configuration, only registered users with the role of “ADMIN” are allowed to access the list of registered users:
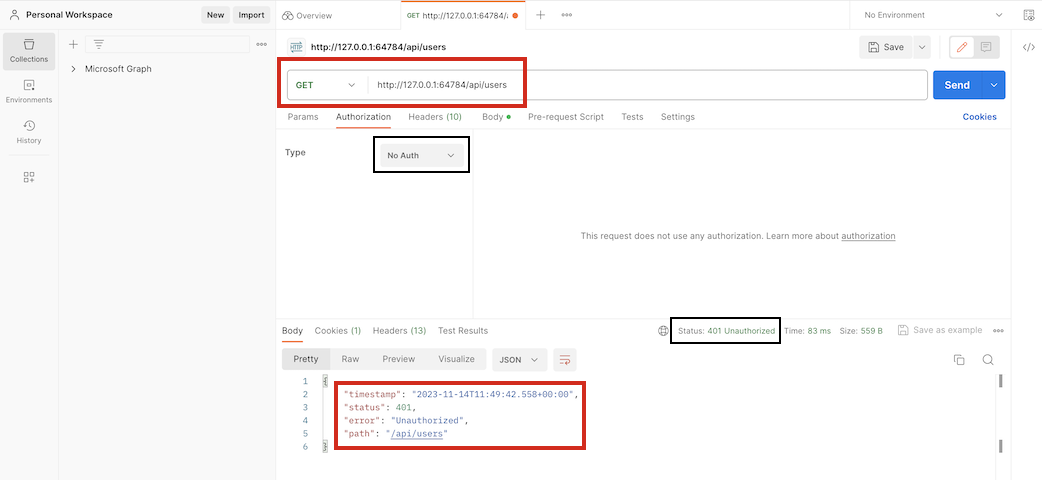
GET /api/users
A registered user with a “USER” role is forbidden from accessing the list of users:
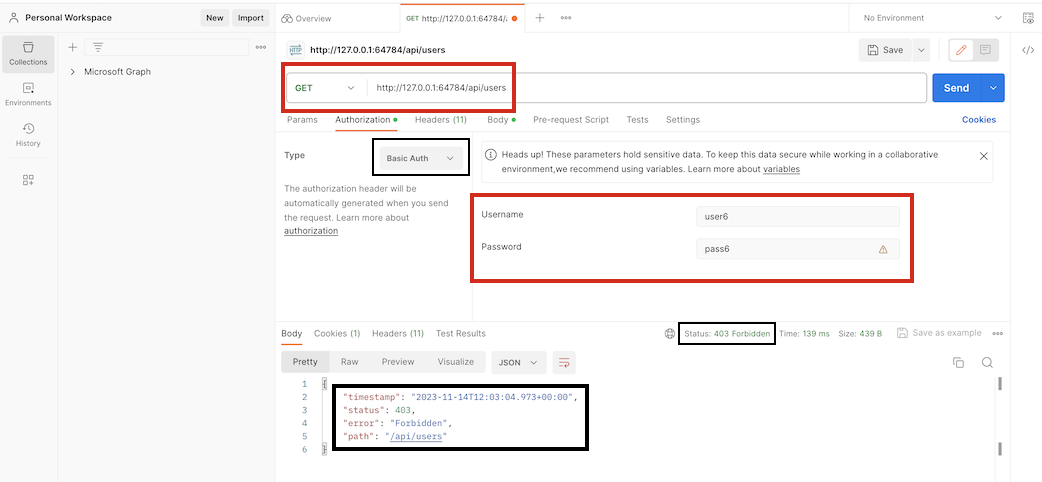
GET /api/users
Only an “ADMIN” user can access the list of users:
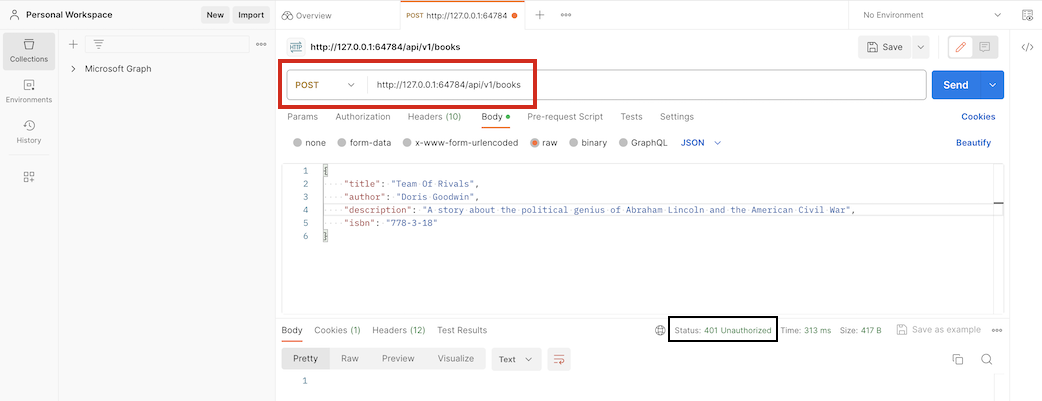
POST /api/v1/books
An unregistered user isn’t authorized to post a new book:
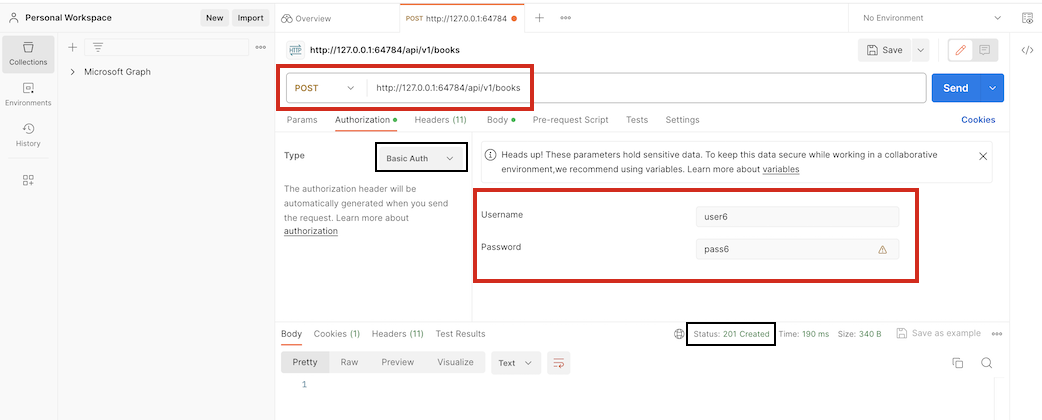
POST /api/v1/books
A registered user can create a new book:
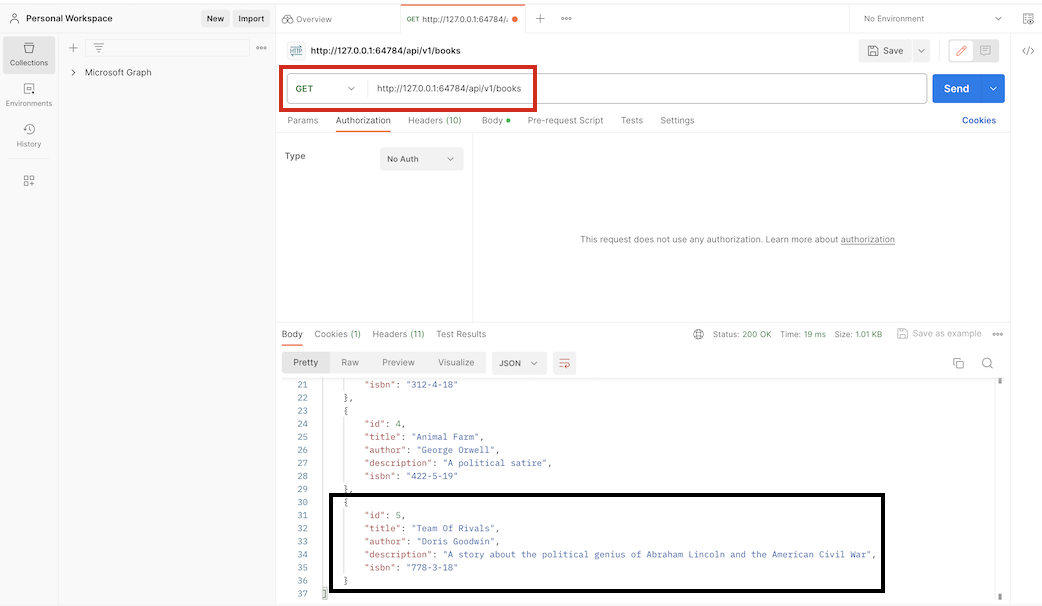
GET /api/v1/books
You can check the newly created book:
DELETE /api/v1/books/5
An unregistered user isn’t authorized to delete a book:
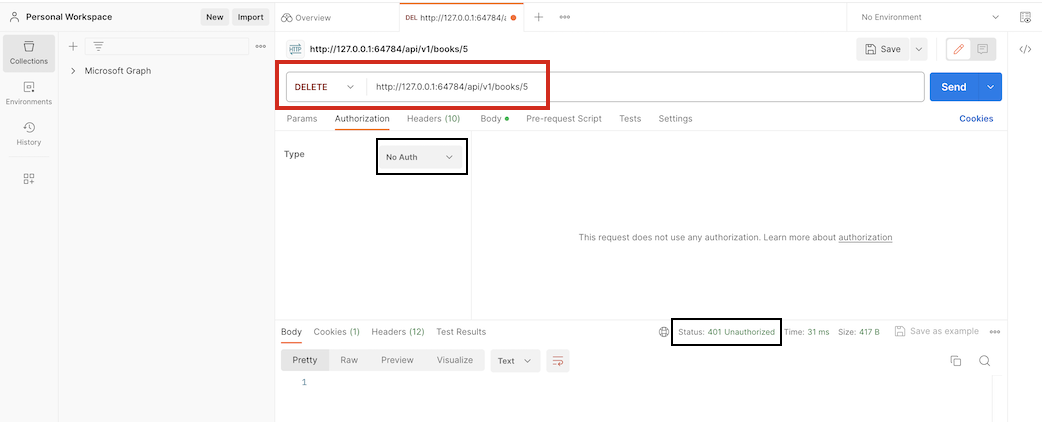
DELETE /api/v1/books/5
A registered user with a “USER” role is forbidden from deleting a book:
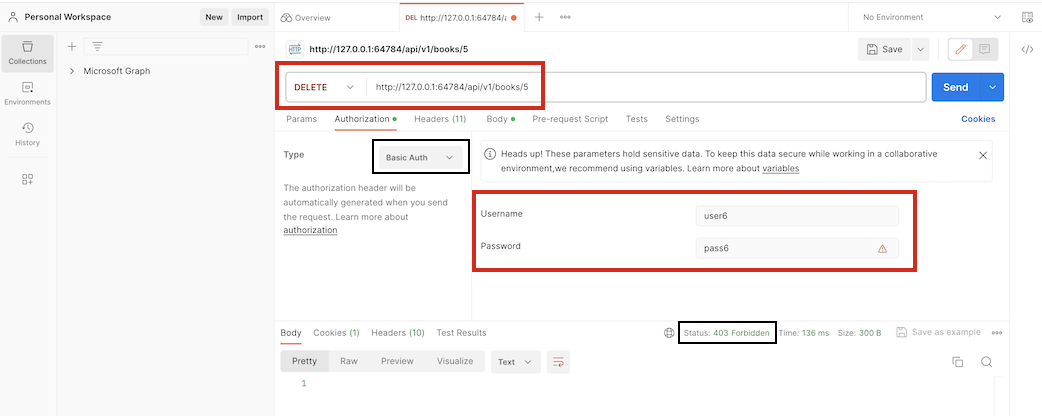
DELETE /api/v1/books/5
Only a registered user with an “ADMIN” role is allowed to delete a book:
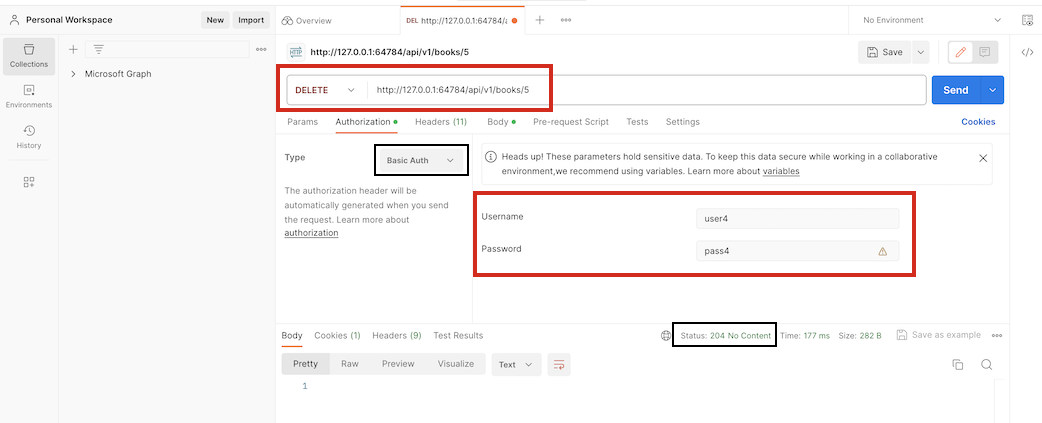
GET /api/v1/books/5
Confirm that indeed the book has been deleted:
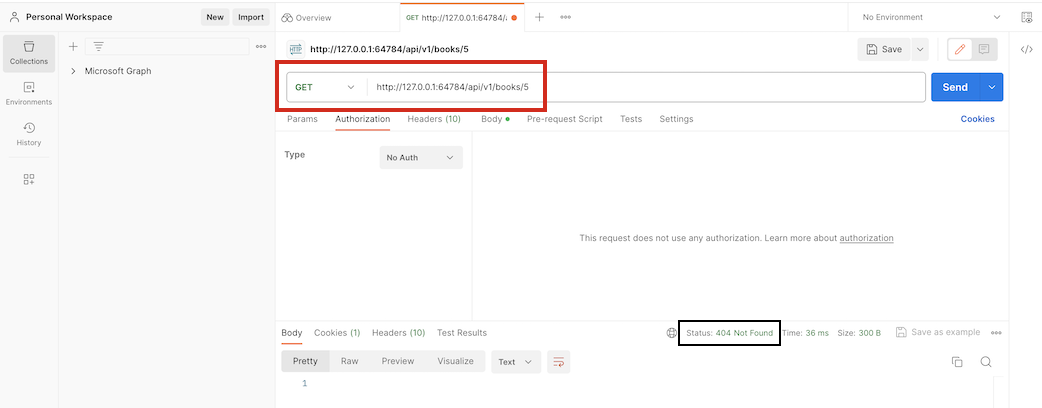
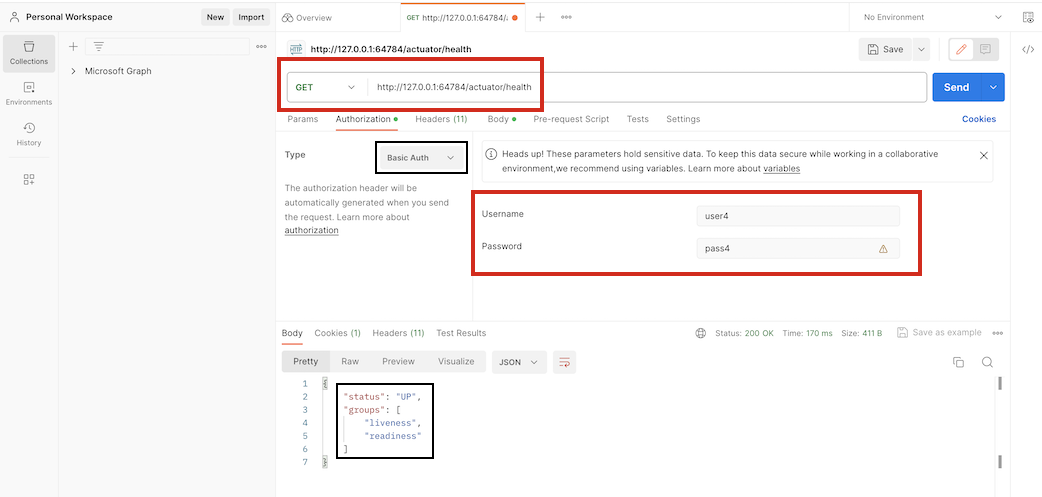
GET /actuator/health
An “ADMIN” user can access the app health endpoint:
Note: Please feel free to test the rest of the endpoints as well.
Conclusion
In this guide, you have seen how to deploy a simple Spring Boot application on a local Kubernetes cluster using minikube. The skills learned here can easily be transferred to a production environment when building cloud-native applications.